Friday, December 30, 2011

2012 CTR primary magnet bookmarks!

Ok people! I finally came up with  2012 Primary theme magnet bookmarks ;-) I could not find anything cute to make them until I found these cute CTR shields at Simply Fresh Designs.com.  She has a bunch of other fantastic free downloads for primary for 2012 that you should check out!  She has a regular bookmark download that is so adorable on her site too.

So just as a refresher if you have not printed out my magnet book marks before.  Click on the 2012 Primary bookmark pictures below to make them bigger.


Copy and paste it to your desktop or the location of your choice.  Then upload it to your favorite photo printing store,  Have it printed out as a 5x7 print because 4x6 crops off too much of the picture.  Then cut the photo in half on the verticle line then fold it in half on the horizontal line. Last of all add magnets to each end on the inside so it looks like the example below (my 2010 primary bookmarks).


So there you have it!  If you have any questions just let me know ;-)

Back to homepage

Happy Crafting
Michelle

Wednesday, December 28, 2011

YW 2012 theme bookmarks!

The New Year is almost here!  In the past I made bookmarks when I worked in the Primary, but now I work in the Young Womens program and so I made some to go with the new 2012 YW theme. I did not do these as magnet bookmarks like I have done in the past because I could not figure out how to make the cute sun work that way. (I wanted it high in the sky) so I just made regular bookmarks, but I think they are still cute :-)
So you just simply click on the picture to make it bigger and then copy and past it to your desktop or where ever you want to (that is just my favorite spot to past things that I want to find easily). Then transfer it to your favorite online photo store. Or if you have a good printer you can just print it out or photo copy it at a copy store.
Make sure you  print them out as a 5x7 photo size!  The 4x6 crops off too much of the picture. then simply cut them in half in the middle were the light grey line is.  It would also be cute to mount them on card stock and even laminate them.  Or you can just keep them as they  are :-)


You can find my Primary bookmarks here :-)

Update:  I made a matching  a handout or Young Women event invitation with this theme.  You just click on the pic and copy it like the bookmarks above.


Back to home page

Happy Crafting!
Michelle

Great Hair tutorials!

So anyone who does not know I am a Hairdresser by trade.  I have always loved doing hair especially Hairstyling and makeup.  When I was in High School I did every ones hair and make up on our drill team before competitions and performances.  So Naturally I went into that field when I graduated from high school.  Right now I am not currently working in a salon, but do a lot of hair for friends and family still.  My goal is to have a  salon in my house in the near future to work out of as soon as my youngest starts Kindergarten.  Anyway after sharing that boring background story on me I will move onto what I really wanted to share in this post.
 I am always trying to keep up with the latest hair cuts and styles so I am often looking on the online for good ideas.  The other day I came across this great blog called "The small things"
 She is also hairdresser and she has amazing step by step tutorials on the cutest hairstyle ideas!  At least I think they are cute :-)  here is a link to her Hair style tutorials.  Here are a couple of my favorites

the elegant half up.

and the Bouncey Curled under

Wednesday, December 14, 2011

A cute Nativity ornament!

Check out this cute Ornament at WildOlive If only I had any time right now I would totally make this!

Pinned Image

I love how it depicts the true meaning of Christmas.
Speaking of the true meaning of Christmas it is my turn this week to teach our neighborhood 3 year old pre-school.  Tuesday we talked about why we celebrate Christmas and that it is Jesus' Birthday.  We also talked about what kind of gift Jesus would want for his birthday.  We decided that the best gift we could give Jesus is to be kind and loving to eachother and to share with eachother and to  help eachother.  So when I saw this little clip I knew that I had to show it to them tomorrow :-)  It is the perfect example of a gift to Jesus!

Monday, December 12, 2011

Fun Handmade Gifts ideas!

Tis the Season! My poor little blog has been so neglected lately!  I keep thinking that my sister Paula will post some of her fun ideas from her Super Saturday she did a few weeks ago, but alas we will all have to be left in suspense :-) I am so excited about how well my Etsy store did this season!  It has been such a blessing to finally master and conquer my fear at using the scroll saw because I am not limited at waiting on others to help me with my projects I can just go and cut them out myself :-)
I decided this year for Christmas that I wanted to take advantage of all the wonderful talent out in Etsy land and other crafters in my area by trading and buying from other hand crafters.

Here are a few fun hand made gifts that my family will be getting this year :-)

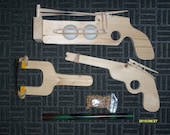
First the Etsy store Backwoods Toys
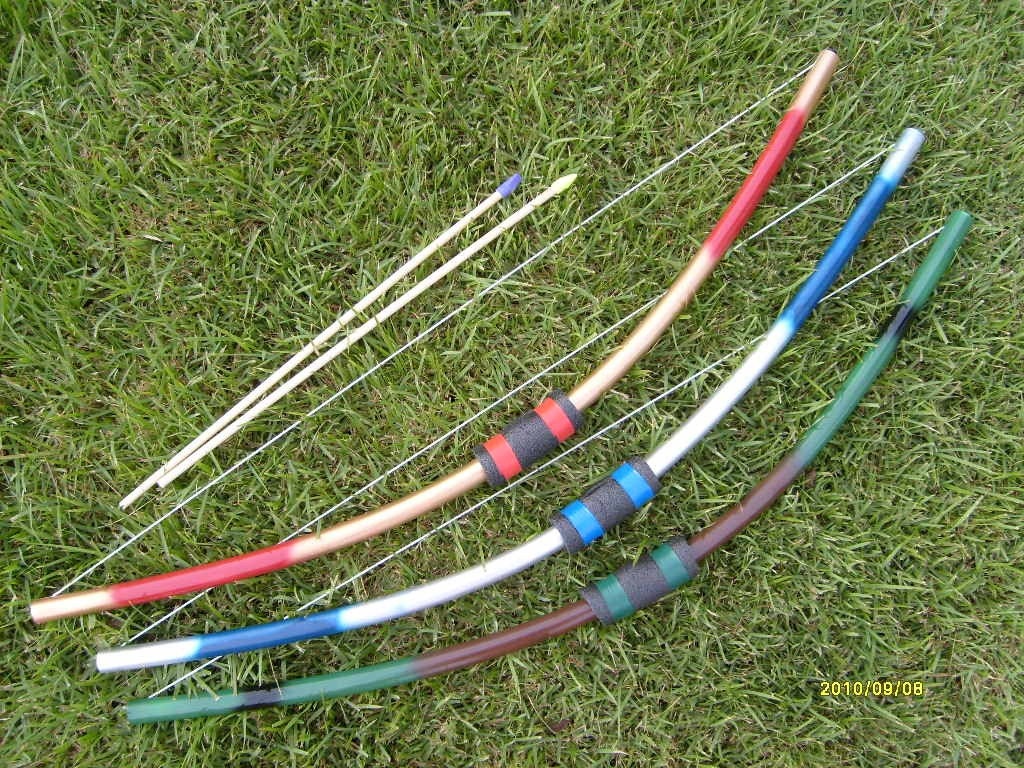
Slingshot, Pea Shooter Combo3 Bows & Arrows for Kids

They have the coolest homemade bow and arrows, pea shooters, Rubber band shooters, ping pong ball shooters etc.  I got what's pictured above for my 11 year old son who loves this kind of stuff! Don't let the homemade look of these items fool you into thinking they are not well made. When we recieved our package in the mail my husband tried the bow and arrow out first and before he could even pull the arrow back all the way he mistakenly let go too soon and it flew across the house! We tried out the all the other little weapons also and they worked great too! And it is safe because they have eraser tips on all the arrows :-)

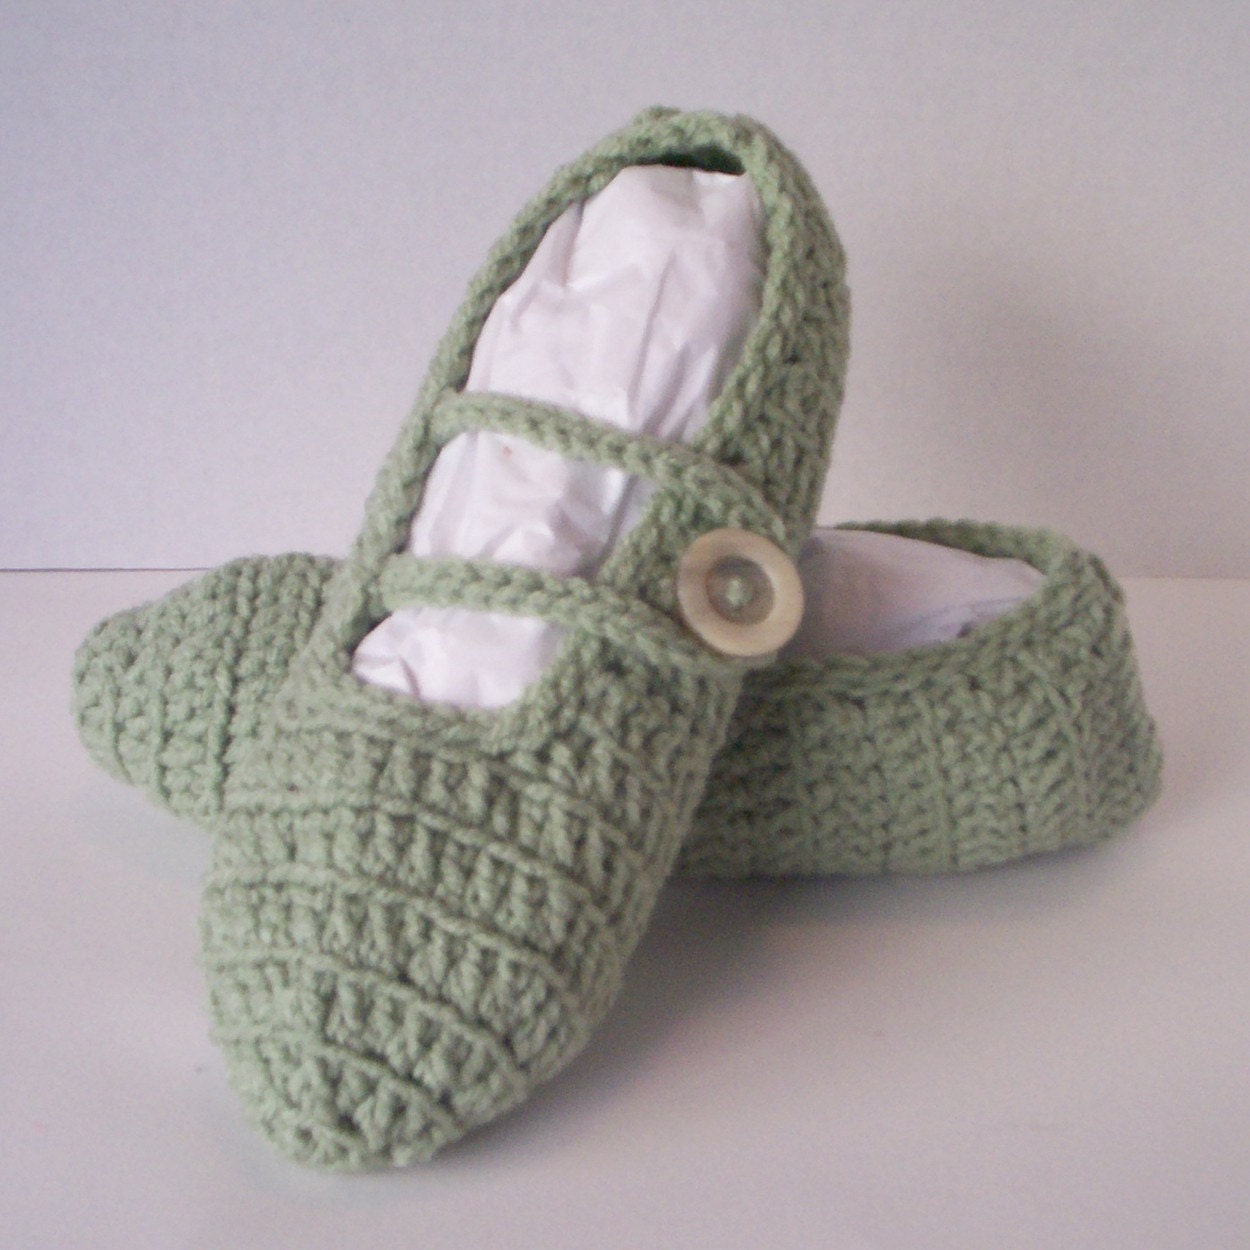
Next I traded one of my puzzles for 3 crochet  Mary Jane slippers from an Etsy store called Made by Mitzy
Women's Crochet Mary Jane Slippers--Frosty GreenThese slippers are so cozy and well made!  I can't wait for my daughters to open them Christmas Eve with their new P.J's :-)


Another fun trade I made with a wonderful lady I met here locally at a craft fair I did.  She makes the cutest Cat and owl dolls! She calls them scrappy cats. She made one for all my girls.  I was just going to get one for my 3 year old, but thought they would be a perfect addition on my teenagers beds to add to their room decor! here are a some pics at what she does. 


And they are even cuter in person than they are in the pictures. 
She does not have a Etsy store yet, but if you are interested I can get you in contact with her just let me know:-)

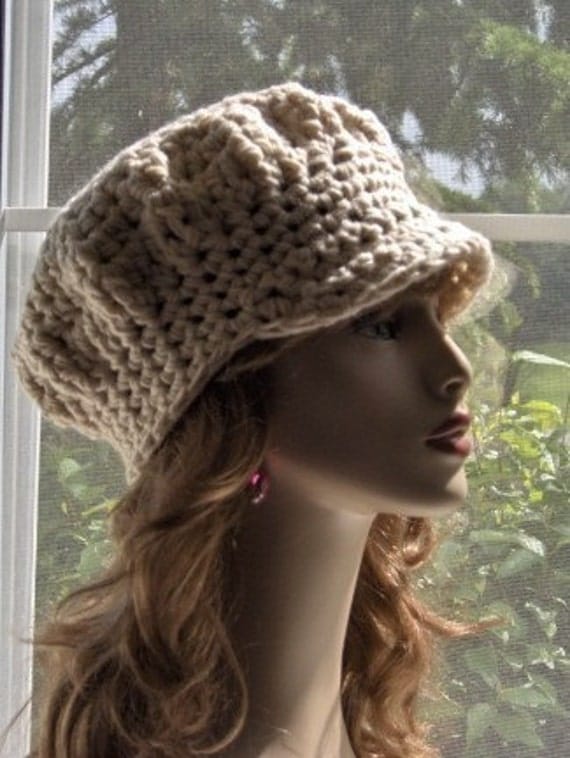
I also think News boy caps like this are so adorable! I found these ones at Angelas studio1 at Etsy :-)
Newsboy Hats Caps Crocheted Newsboy

So think about adding some unique original handmade gifts to your list this year :-)

Happy  Crafting everyone!
Michelle

Monday, November 28, 2011

Crazy busy!

I have been super busy the last 3 weeks trying to keep  up with my Etsy store.  My biggest seller being my Nativity puzzles!  So forgive me if I do not post much in December.
Today I thought I would show you my latest ideas that I am selling in my shop.

First off My Mini Nativity Puzzle.


Miniture Nativity puzzle with wood burned design

I decided it would be fun to have a smaller version.  I can't get my 3 year old to leave it alone!  She really likes to play with it.  I also thought this smaller version would be fun for super Saturday.  I have done the bigger version before with success, but the smaller one is cheaper and a little less time consuming.

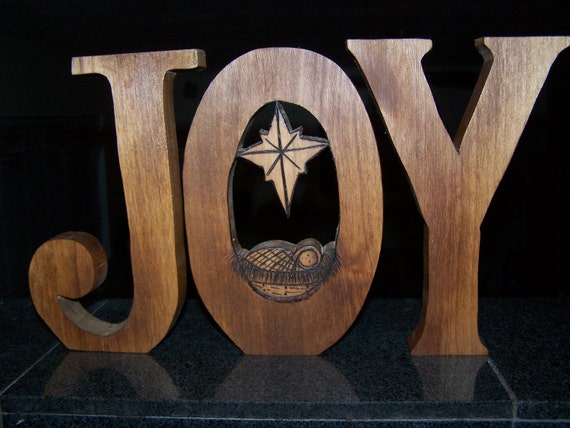
Next my Joy letters with baby Jesus.
Joy with baby Jesus

Joy with baby Jesus

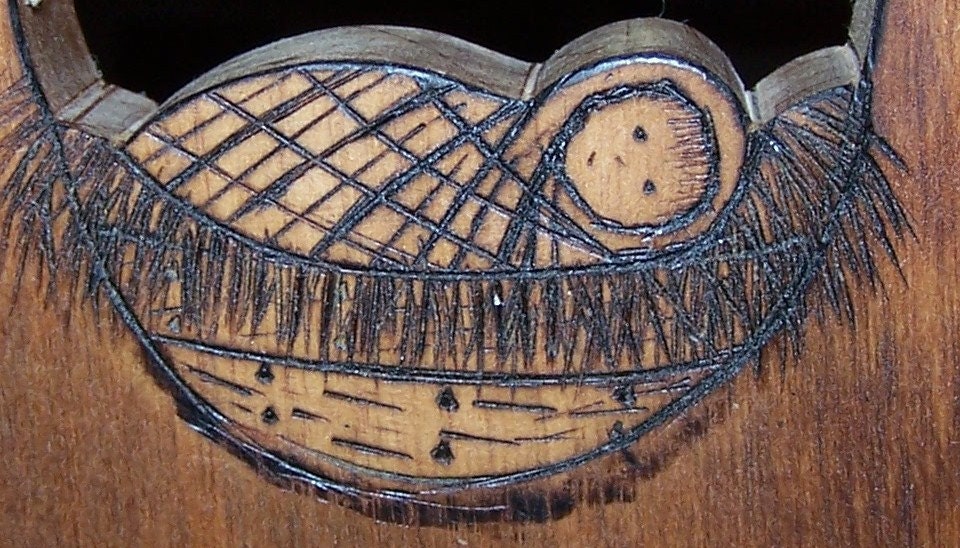
So as you can see my wood burning is still going strong! This baby Jesus was fun to make :-) 

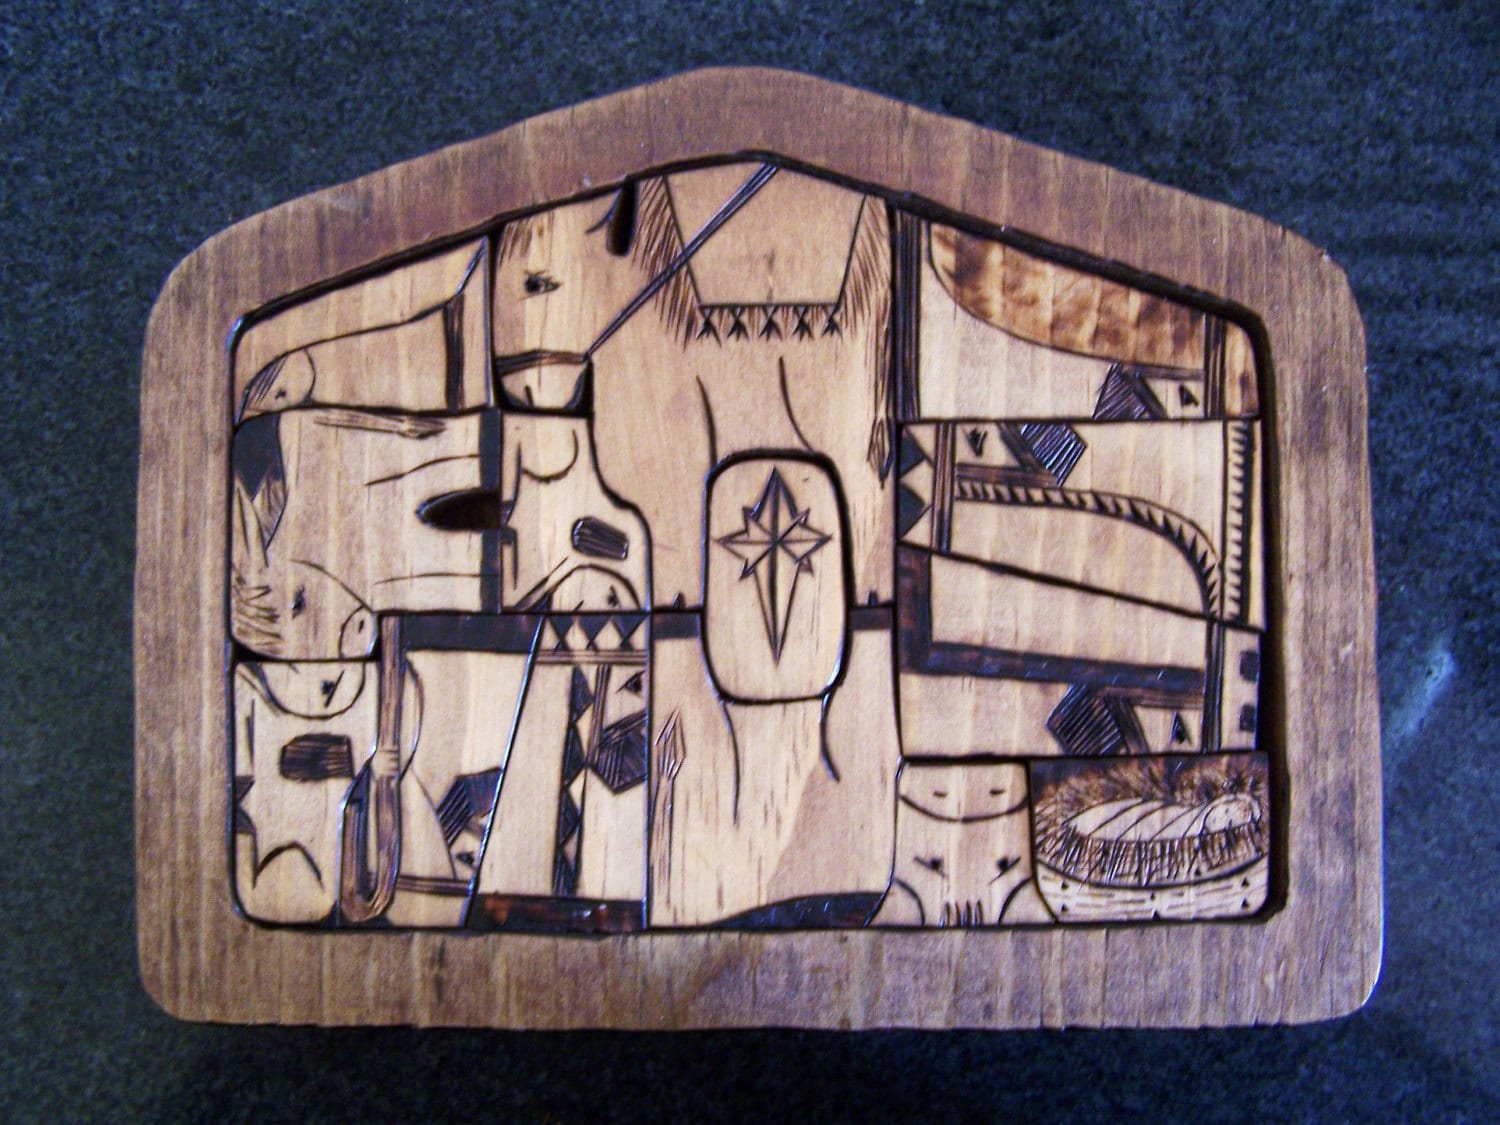
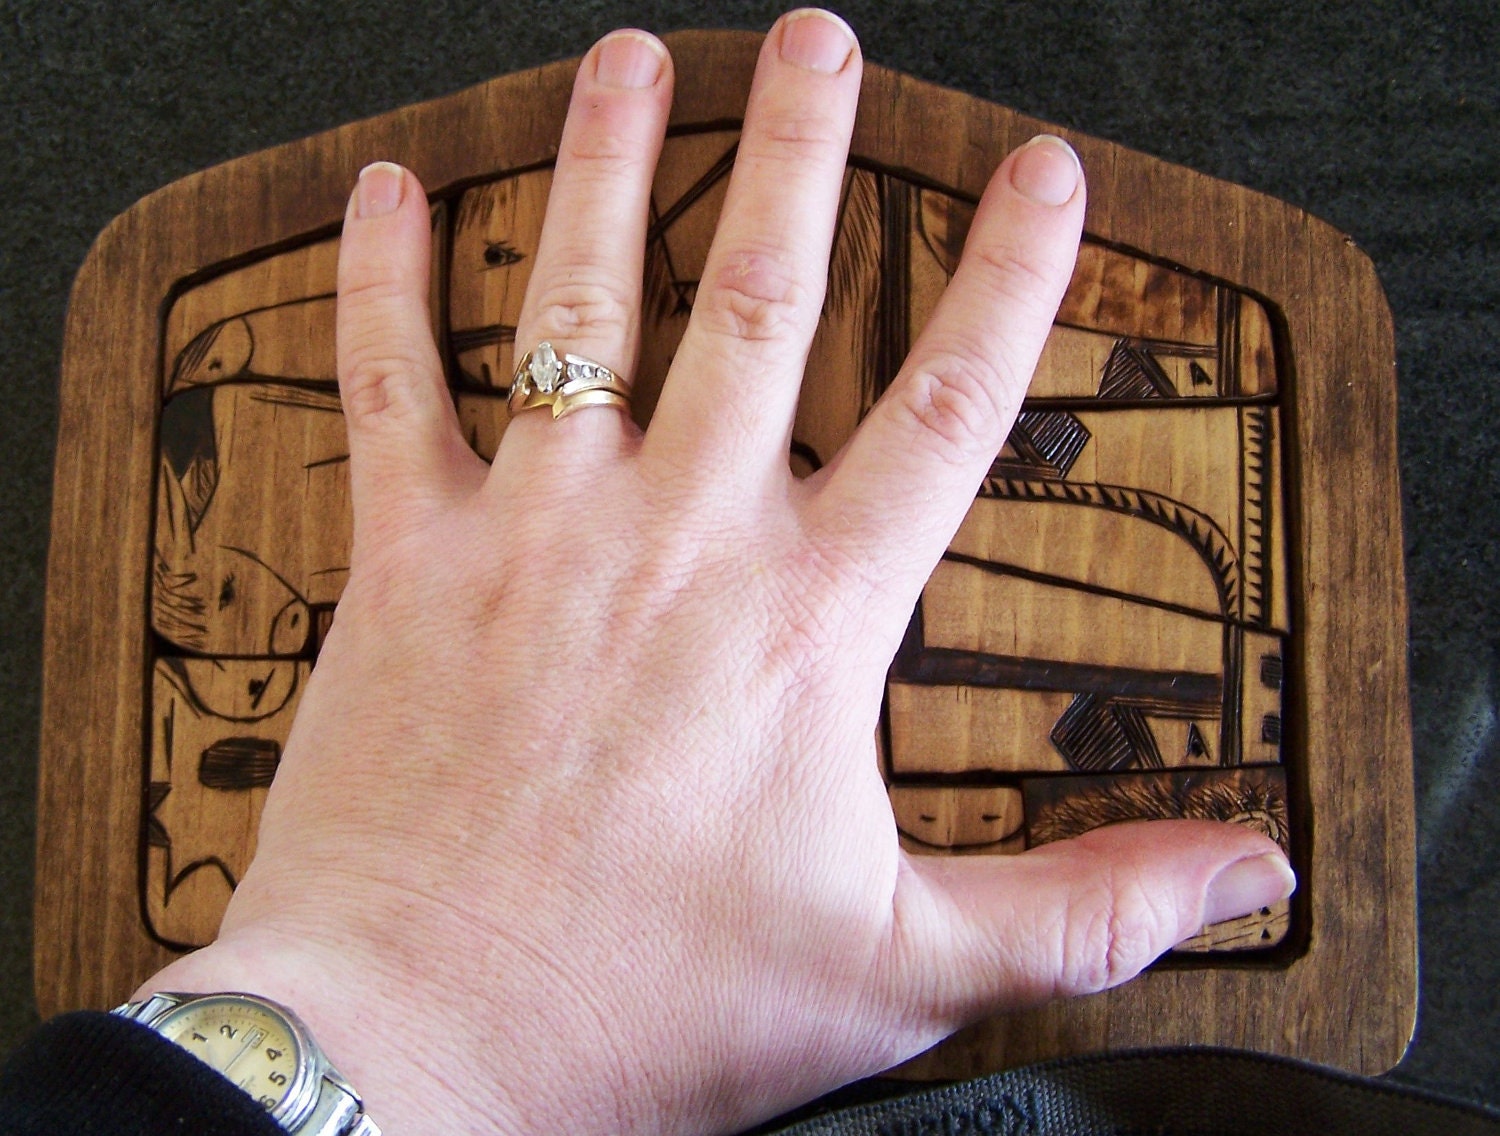
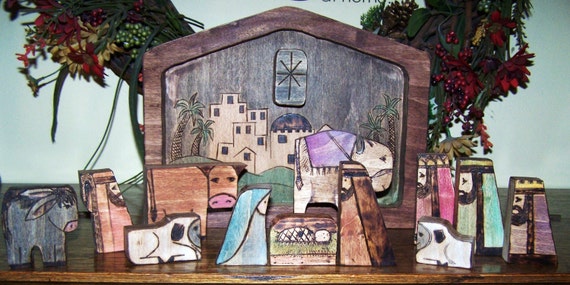
The most popular thing in my store that everyone seems to want is my Wood burned, water color, dark stained Nativity puzzle.
Nativity Puzzle, wood burned design, water color, and darker wood stain

so that is what I will be doing non stop until about mid December!  but I will ride this wave as far as it will take me :-) 

Happy crafting!

Michelle

Thursday, November 24, 2011

Dinner rolls

Happy Thanksgiving everyone!
 I slacked at my plans to post Thanksgiving recipes all week :-/  I have been crazy busy making Nativity puzzles for my Etsy store.  I have been getting orders about every day.  I have 3 puzzles I want to have ready to go by tomorrow!  So I will be spending my Thanksgiving day working on finishing them. 
I am going to my Sister In laws for Thanksgiving and I have been asked to bring the rolls.
I have several roll recipes I like one of them being my moms, but I especially like my neighbor Shauna's rolls :-)
So I thought I would post her recipe.  also I never got to the Turkey My mom had special ways to make a perfect Thanksgiving Turkey. She always said that you need to bake a turkey breast down so the fat and juices from the back settle into the breast and make it more tender.  She had other things she did, but when she passed away she took that knowledge with her.  So I found this link that is very similar to her way of roasting a Turkey so it is what I have followed for the last 3 years. 

Now onto the roll recipe!


Shauna's dinner rolls


2 cups scalded milk (or better yet, 1 cup evaporated milk and 1 cup hottest tap water!)

¾ cup warm water

1 cube margarine, melted

***(you want the temperature of all the above liquids to be 90°-100° or about baby bottle temperature. So if you scald the milk or overheat the margarine, use cold water instead of warm water etc.)***

2 large eggs

½ cup sugar

2 tsp. salt

4 cups flour

2 Tbs. yeast

Add the ingredients in the order listed above, whisking in the eggs and adding the yeast on TOP of the flour (to shield it from the salt). Add 3-4 more cups flour, a ½ cup at a time until the dough cleans the sides and bottom of the bowl. Knead for 7 minutes. Turn out onto lightly floured surface. Squeeze off balls of dough about 2 ¼ inches in diameter. Place about ½ inch apart on a greased baking sheet. Preheat oven to 400°. Cover dough with warm wet towel and let rise about 20 minutes or until double. Bake 15-18 minutes or until golden brown. Brush with butter and cover with a towel until serving. Here's a little video to show you how Shauna shaped the dough balls!

Saturday, November 19, 2011

Wild Rice Cornbread Stuffing

So today I am posting my sister Jana's Wild rice cornbread stuffing recipe.
My mom had really yummy stuffing, but I have to admit I like my sisters just a little bit better ;-)

Here is my sister Jana with her wonderful husband!

She is the third oldest in our family and was and still is the peace maker.  She and I were really close growing up. We shared a room even though I was the youngest and she was one of the oldest.  She is an awesome cook and wonderful mother. She also has the most loud and contagious laugh out of anyone I know :-)


Jana's Wild rice cornbread stuffing recipe

 Make the wild rice the same as on the package, separately.
Cut up onion and celery and simmer with the water for the corn bread stuffing until tender.
 Add the bread as usual.
 Combine the cooked wild rice with the completed stuffing and drizzle on turkey drippings until the stuffing is the right consistency.

That's it!  Easy and yummy!

Thursday, November 17, 2011

Dollar store arm warmers

Lately I have been looking for cute arm warmers/ open finger texting mittens for my teenage daughters, but I have not found any in the price range I want. So I was at the dollar store tonight and we saw some cute toe socks hanging on an end cap.  I have always hated toe socks because I think they are super uncomfortable.! I think all socks are uncomfortable though ;-) Anyway the minute I saw them  I knew exactly what to do with them! 

Ta Da!  Instant arm warmers/ texting mittens!

Tuesday, November 15, 2011

Mom's Pumpkin pie!

I was lucky growing up to have the most motherly,  homemaking kind of mother! 
This picture below is was very typical!  A big family of kids and grand kids and Mom/Grandma in the middle keeping everyone happy :-) But that is what gave her joy! (She is the one in the white shirt in the middle.)
 My Mom and Dad a few years before she died of cancer.
We had the best childhood because of  our wonderful parents :-)
I'm the littlest one in this picture and Paula is the one with the really short skirt ;-)
We have 6 kids in our family, This picture was taken sometime in the late 70's of us 4 youngest girls and our dolls.
My mom was a fabulous cook because she grew up on a Potato farm in Idaho and decided that she preferred doing all the cooking for her family instead of working in the potato fields.  So she started cooking as a young girl. So with Thanksgiving coming I think of my Mom and her wonderful Thanksgiving meals!  My sisters pictured above are also wonderful cooks So over the next week I am going to post some of my Mom's recipes and other family recipes from me and my sisters  that always make our Thanksgiving Dinners super Yummy!

So first off Mom's Pumpkin Pie!
This recipe was passed to her from her Mother and I don't know where it came from before her, but it is wonderful!  I have the best memories about this pie.  We would eat our Yummy Thanksgiving meal until we were sick and thought we would pop!  and then a few hours later (Maybe just a couple ;-)  We would break out the pie with homemade whipped cream!   Then for the next two days we would live off Turkey sandwiches made with the super yummy leftover homemade rolls my mom would make and left over turkey and left over pumpkin pie :-)  Those were the days when I could eat what ever I wanted and nothing happened to my body shape!  Those days are long gone, but it does not keep me from gorging myself at Thanksgiving still :-)  Two keys to what makes my Mom's pumpkin pie so good is #1  Don't add cloves!  She said that is what makes other pumpkin pies taste too strong.  #2  She used winter squash (usually grown from our garden)  instead of canned pumpkin it gives a nicer flavor, but we have used canned pumpkin before and it tastes really good still.  so with out further ado here is the recipe I don't have picture yet, but I will post some when I make my pies in the next few days, but just trust me!  This recipe tastes so yummy!  It is the only pumpkin pie my family will eat!

Mom's Pumpkin pie recipe
(makes 3 pies) heat oven to 350

4 cups squash or pumpkin
4 cups  rich milk
1 cup white sugar
1cup brown sugar
4 eggs
1 tsp salt
1/2 tsp ginger
1/2 tsp all spice
1 1/2 tsp Cinnamon
1 tsp vanilla

Mix all ingredients in a large bowl (blend well)
Pour into pie pastry plates.
Bake 45-60 minutes or until the center bubbles.  (  bubbles mean big rolling movements in the center of pie.  It almost looks like something is moving around inside the pie. ) It also works best if you put tin foil around your crust edges so they don't over bake.

Mom's Pie Crust

3 cups flour
1 cup Shortening
1 tsp salt
1/2 tsp B.P.
3/4 cup water (add more if needed to make a more workable dough)

Roll out barely thin  and place in pie plate cut off excess dough from edges and then flute the edges.

Sunday, November 13, 2011

Gobble!

So here is the update on my first Craft Fair.  It was kind of a bomb, but some good came out of it :-)  This was the first year for this particular craft fair so I know each year will get better.  I also had a poor spot for my booth that was not visable enough.  Next year I know exactly where I want to be!  Anyway I made about a $60.00 profit so it was not a complete failure, And I was able to make a couple of trades with other crafters that I am really excited about!  Anyway I wanted to show off a couple of Thanksgiving crafts that I have made recently (mainly for this Craft Fair) since it is close to Thanksgiving.

First my "Gobble" letters.  I really liked how these turned out.  I saw something like this on Pinterest and once I  found a font that I liked I cut out my own version ;-)  here it is displayed at my craft fair booth.  It was a big hit there and I was sad to see it go :-(


Next I made another one of my Thanksgiving Turkeys, but I painted it with water color paint instead of doing the scrapbook paper.  I also wood burned the the beak and around the feathers.  I like how you can still see the wood grain through the water color paint.

Friday, November 11, 2011

more puzzles!

So I decided to add a background to my Russian doll puzzle and I also made another Russian doll puzzle and a vehicle puzzle too! You can order these at my Etsy store if you want a unique gift for a little one.  My 3 year old has been having a great time playing with these puzzles this week ;-)


So there you go!  Happy crafting everyone!
Michelle

Tuesday, November 8, 2011

Matryoshka doll puzzle

So here is puzzle #2!
 I was at a friends house recently and she had all these neat wood puzzles that were just simple and fun :-)  A couple of them were even from her childhood.  As I watched the kids happily playing with them I thought I bet I can make one of those!  Wood puzzles are hard to find and when you do find them they are  kind of expensive. I thought that they would make nice Christmas gifts for little ones (mine included).  So I started looking on Google for simple color pages for some inspiration that would make good wood puzzles. I found some cute ideas!  here is the  Matryshka doll puzzle I made :-)

First I cut the doll shapes out of a carefully measured piece of pine wood. I also cut little notch holes at the bottom of each doll so that they could more easily be taken out.  Then I glued a nice plywood on the back.
Next I drew my dolls. (Before I had the doll designs drawn on my little 3 year old thought they were ghosts :-)  Any way then I took my new trusty wood burner tool and wood burned over my drawn design and here is what they looked like after that.


Then I painted them with water color paint.


Now before I stain it I am trying to decide if I need to put in some sort of back ground or put a title of "Matryoshka dolls" on it  somewhere.  Anyone have any ideas?  Should I leave it be or add something more?

Michelle

Saturday, November 5, 2011

A rainbow puzzle!

I spent a big part of my day yesterday cutting out new wood crafts for an upcoming craft fair I am doing this coming week.  I have never done a craft fair before and I am kind of nervous if people will be interested in my stuff.  I am mainly saleing my my Nativity puzzles and then adding some other things on top of that. 
I saw this stacking rainbow puzzle here.  And decided I wanted to try something like it.
so this is what I came up with :-)

first I found some rainbow clip art and then transferred it onto wood and cut it out with the scroll saw.

Next I painted the wood pieces.  My new favorite paint medium is water color paint!  I like how you can get a nice vibrant color yet you can still see the wood grain. 


Ta Da!  The grand finish!  I am not sure if I have the color order right, but my daughter assured me this was the color order since i was too lazy to get up and google it at the time. 


I think I will do it on thicker wood next time so it would be more durable for little kids to play with. 
I made 3 other type of puzzles too.  I will show them later this week as I make them :-)

Tuesday, November 1, 2011

I decided to stain it ;-)

I decided just to stain this one. And I decided that I love the wood burning tool:-)
Here is a close up on the texture around the star and sky.

Sunday, October 30, 2011

Wood burned Nativity puzzle

Hey all!  I had fun last night wood burning another Nativity Puzzle.  I am feeling more and more comfortable using the wood burning tool.  I love the texture and character it gives the puzzle.  So here it is done raw.
This Puzzle was one of the first ones I cut by myself with the scroll saw so the lines are not perfect and straight, So I had it sitting in my less than perfect pile. I have been practicing my wood burning on my imperfect puzzles first while I get the hang of it, but I've decided that this puzzle looks like I intentionally tried to cut it like that.  I think it gives it character. I have not decided if I want to just stain this one or add a little splash of color here and there.   I will post tomorrow what I decided
to do ;-)

Find all my Nativitiy puzzles for sale at my Etsy store Bugaboocrafts

Thursday, October 27, 2011

My new craft toy!

Walnut Hollow Creative Woodburner Value Pen
So I have been wanting to get a wood burning tool for a long time!  And this week I finally got one.  I specifically wanted it for my Nativity puzzle so I could give it a different more rustic look.  Here is my first wood burned puzzle :-) I also decided to try water color paint instead of acrylic paint So it would have more of a muted look.


I am really liking my wood burning tool!  I really like the look it gave the puzzle.  I love how the watercolor turned out too.  After I painted all the pieces I applied a wood stain all over everything.