Showing posts with label Girly stuff. Show all posts

Thursday, June 7, 2012

DIY Rose Wire Rings

I saw this tutorial at Handmadeology.  And I thought to myself  hmmm..... I can do that!   Or something similar to it anyway :-)   I did not have the right wire on hand, but it was about 9:00 at night (too late to go to the craft store) So  I decided to mess around with some galvanized steel wire that we had on hand in our garage, and this is what I came up with :-)


If you are interested to know how to make one yourself  here is a little tutorial of how I made them.  I feel like I am terrible at explaining  tutorials so hopefully it makes sense :-) 

These are the supplies that I used. Galvanized steel wire we had in our garage,  wire cutter and pliers, and a tube of chap stick.


First I got a piece of wire.  I am not sure how long it is.  I just unraveled two rotations from the this wire spool. maybe it is about a foot long.

I realized right away that the wire was pretty thin so I doubled it up. 


Then I twisted it to give it more stability. And happily I think it gives it a nice look with the twist.  I found that it helps to get a more uniform twist if you use your pliers. it is hard to see in the picture that I am twisting the wire, but if you look really close you can tell :-)


Once I had it all twisted I wrapped it around a chap stick tube. this is the part where it gets confusing to explain.  I placed the chap stick tube directly in the center of my wire piece

 then I wrapped the wire around the tube crossing the two ends across each other. 

Then I wrapped it around again a second time until the two ends met up again.


This time cross the ends and twist them around each other once.


Then start wrapping/spiraling them around the middle twist part.  


Keep wrapping/spiraling them around until you can't wrap them anymore. At this point you need your pliers to help tuck the ends under and I also use the pliers to shape it a little more to my liking.
And this is what you end up with :-)


I have made one for each of my girls even the 3 year old.  They love their rings :-)
I love it when I can make pretty things with ordinary stuff laying around my house!

Saturday, February 4, 2012

Hand made baby gifts.


A while back I made aprons for a wedding reception for my friends daughter.  Well today I was able to attend her baby shower :-)  She has such sweet new baby girl!  I got to make some fun baby gifts that I have wanted to try for a while. 

Her little girls room colors are Hot pink, black and white so that is the theme I went with :-)

I had some leftover Onesies from a previous baby shower gift project so I decided make a Faux Pearls Onesie.  I don't need to tell you how I made it because there is already great tutorial at The Crafted Sparrow.


To match the cute Onesie I made a cute Tutu :-)
This was so simple to make I could not believe it!
You can find the tutorial for this at Skip to my Lou.

Instead of using my leg I did mine on a paper towel roll and I also used a ribbon instead of the stretchy cord.  Although for my 3 year old I think I will do the stretchy cord. I also made the flower with a all three of the mesh colors and the ribbon together.  A great flower making tutorial is here at My Sparkle. I also made another flower hair clip.  So here is what the whole outfit looks like together :-)  It is so much cuter in person too!
The next project I did was a Waldorf inspired teething ring gnome doll.  I have been wanting to make something like this to sale in my Etsy shop so I was excited to finally try one out.
I saw this tutorial at Craftster.  I liked how simple this doll was.  And since I decided to make this yesterday I thought this would be a pretty simple one to make.  Here is how I made mine. I followed her tutorial pretty much the same, but I added ribbons to the hands and feet and connected my wood teething ring to one of the hands.  Instead of using watch cloths I used a hand towel so that it would be a little bit bigger.  Instead of felt I used a cute black and white fabric, but because it was a thinner fabric it did not want to stand up so I had to put stuffing in the hat.

 
I don't think mine looks like a gnome.  It looks more like a clown or a wizard, but I think it turned out cute.


Thursday, November 17, 2011

Dollar store arm warmers

Lately I have been looking for cute arm warmers/ open finger texting mittens for my teenage daughters, but I have not found any in the price range I want. So I was at the dollar store tonight and we saw some cute toe socks hanging on an end cap.  I have always hated toe socks because I think they are super uncomfortable.! I think all socks are uncomfortable though ;-) Anyway the minute I saw them  I knew exactly what to do with them! 

Ta Da!  Instant arm warmers/ texting mittens!

Thursday, August 18, 2011

Glitter toes tutorial :-)

I got to go to girls camp this year with the Young Women in my Ward. The girls enjoyed doing pedicures and Glitter Toes to each other!   This whole glitter toes thing was new to me so I thought I would share how it is done :-)

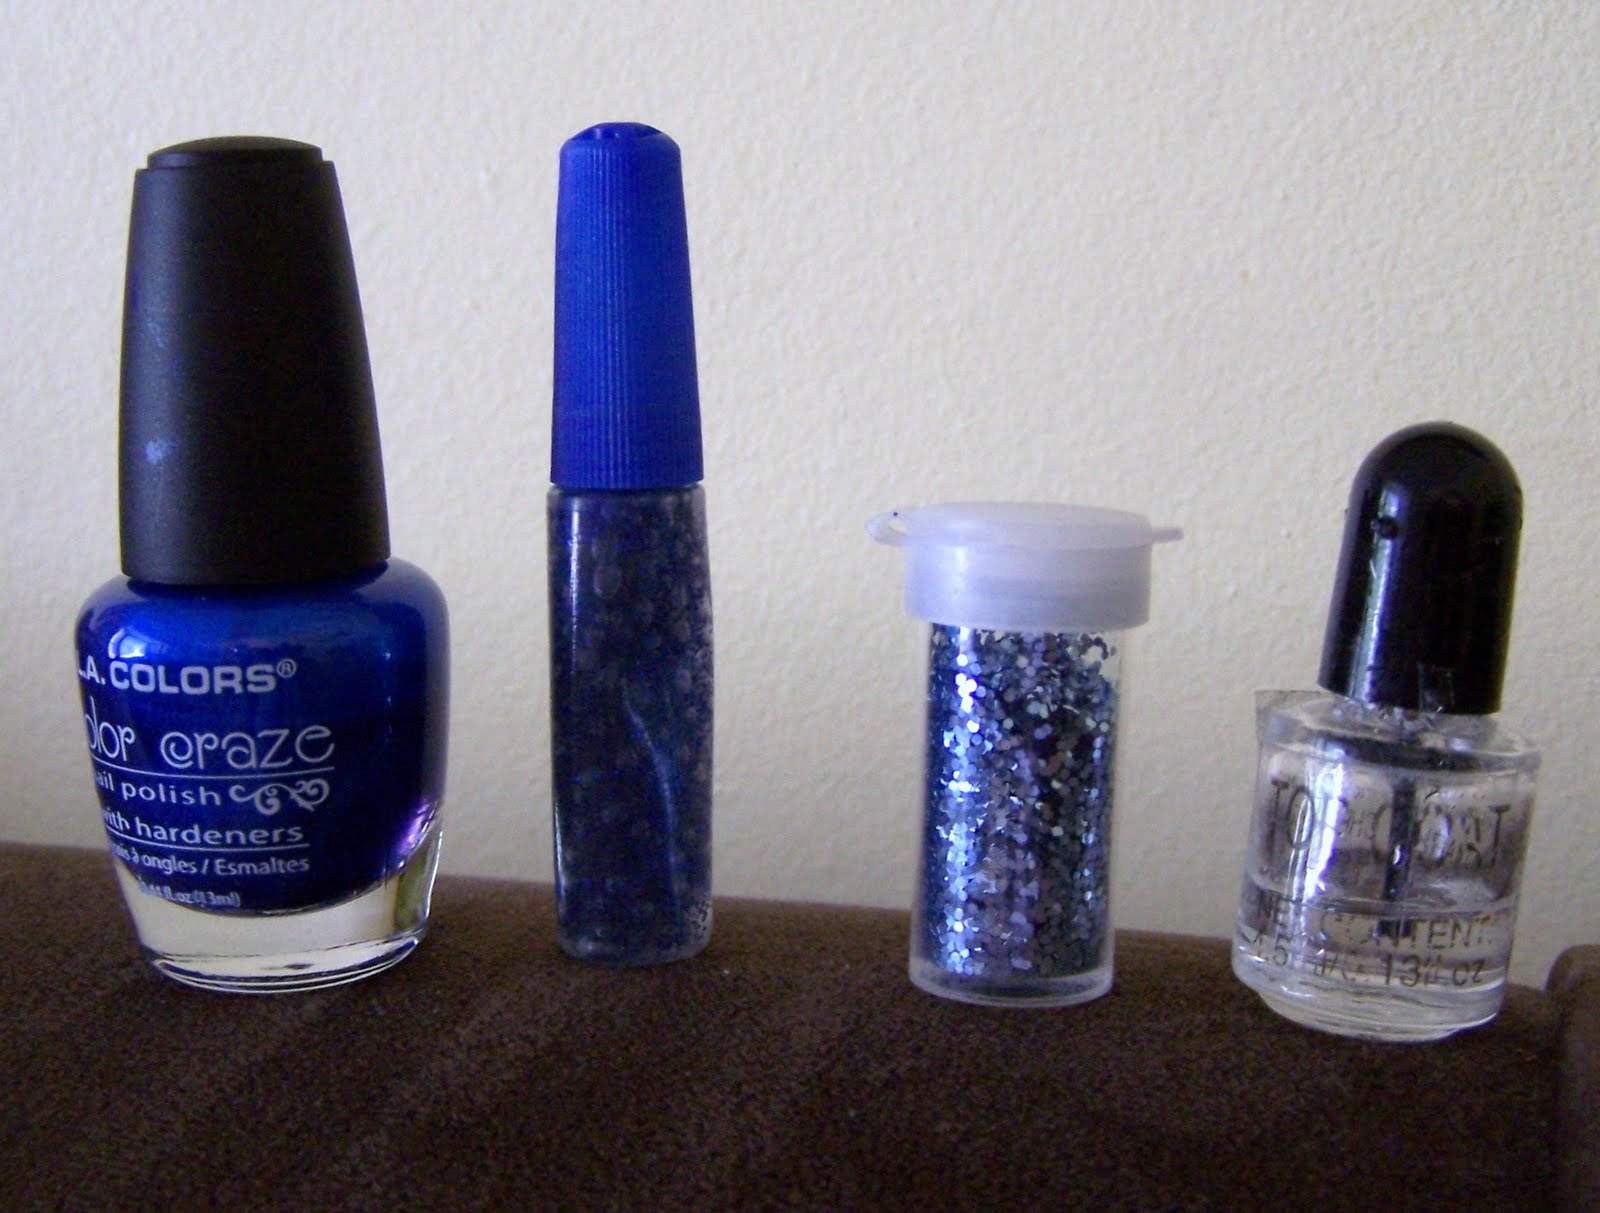
Here are the supplies you will need
Finger nail polish 
 glitter the same color
gel glue
 clear finger nail polish
First you paint all your nails the color of your choice.
Next  you apply the glue.
Use the tip of the glue to evenly spread it on each nail.
Next comes the glitter.
sprinkle the glitter on all the toes and push it evenly onto each toe nail.

Next the clear nail polish.
clear any excess glitter around each toe nail and then apply clear nail polish on each toe nail
There you have it! glitter toes!
It was cute my daughter could not stop looking at her glittery toes :-)