Showing posts with label favorite recipes. Show all posts

Thursday, June 21, 2012

Yummy Italian Pasta with Tilapia!


 So I was sitting there wondering what I should make for dinner?  Of course as usual I had forgotten to take meat out to thaw on time for dinner, but I remembered I had frozen Tilapia which can cook quickly frozen.  I was pondering this when my daughter told me she felt like having some type of Italian pasta.  I thought... can you make pasta with fish?
So I looked it up and sure enough their were tons of recipes, but none was exactly what I was wanting so I took a couple of ideas from a couple of different recipes and then I added my own ideas also :-)  
It turned out so Yummy!  So yummy in fact that my husband who does not normally like fish had 3 helpings!  And it was a nice light summer meal, but yet very filling.

I hate posting pictures of food because it does not like as good in the picture as it does in person, but I thought I better give you an idea of how it looks.


So here is what I did :-)


Ingredients

about 5 Tilapia fillets

one small onion chopped up fine

a couple of cloves of garlic minced

1 tablespoon Parsely

 1 tablespoon Oregano 

1 tablespoon  Basil

2 cans of Italian tomatoes

1/4 cup cream cheese

cup of frozen spinach

oil as needed in the cooking process

A 16 oz package of pasta (whatever you kind you like)


First bring  a pot of water on the stove to boil (for the pasta) and turn the oven on to broil (for the fish).  In a deep skillet saute onions and minced garlic in a couple of tablespoons olive oil at  medium heat on the stove.
After the onions are cooked down add the two cans of diced Italian tomatoes (or you can used Italian stewed tomatoes instead.) Next add all the herbs and let it simmer.  while that is simmering place Tilapia fillets on a shallow cooking sheet drizzle with oil and sprinkle with lemon pepper and season salt then place it in the oven to broil. (Add your pasta to the boiling water if it is ready at this point.)  I don't know an exact time the fish are done under the broiler I just keep checking them until they look moist but flakey.  Once they are done I add all the fish to the skillet mixture and mix it together (the fish naturally flakes off into chunks).  Next I stir in  the spinach and cream cheese and I let it simmer together until everything is mixed in and heated through.  By this point your pasta should be done so you drain it. Spoon the Tilapia mixture over the pasta, sprinkle  Parmesian or Feta cheese on top and enjoy!

I would love to hear back if you tried this meal and what you thought of it :-)


Tuesday, May 1, 2012

Quesadilla Maker Pancakes!

Hi people :-)
I have not posted in awhile..... it seems :-/  
I have been concentrating most of my energy right now on my garden.  I just put my Tomato and pepper plants in the ground and I planted almost all my other stuff about a week and a half ago and it is fun to see all the little baby plants coming up :-)  In my next post I will share with you what I have been doing with my garden this year.
Enough about my gardening fetish and lets move onto Pancakes!

I saw a while back someone somewhere  talk about how they make pancakes in their Quesadilla maker and I thought to myself, Don't I have a quesadilla maker?  So entered my dark cave (garage) where I store all  my rarely used appliances and sure enough there it sat way up high on a tall shelf where it has literally collected dust for about 3 years maybe 4?
 I had forgotten I had it!  I could have used this all this  last year as my 3 year old has begged me for quesadillas for lunch.

I wanted to also try this IHOP pancake recipe I found on pinterest;.  I thought it would be fun to try them both out and have breakfast for dinner.


They were so Yummy!  I doubled the recipe and after a family of 6 people ate this is how much was left pictured above.  I also added blueberries to half the batch.  What I liked about them is they reminded me a little bit of heaviness of German pancakes, but with a lighter texture. I also found these smaller triangles were perfect sized for my 3 year old who cannot normally finish a big pancake.

Some tips:.
1. spray your Quesadilla maker with cooking spray before you pour the pancake batter in.
2.  I poured about a 1/4 cup per triangle section.
3. Cook for about 2 min.  It gets pretty hot so check it at about a min and a half and poke the fattest part.  if batter oozes out you know you need to shut it and cook a little longer. But I found two minutes was pretty perfect except for the batches I made with blueberries had to go a little longer than 2 min.
4. You can pull it out as one big pancake with triangle sections still attached per each persons plate. or break it up in smaller triangles like I did for people to take as much as they wanted.  I did find that people ate 5-6 triangles(besides the 3 year old she had two)  so it came out to about the same.
5. For the pancake recipe I did not have buttermilk so I just added 2 tablespoons of vinegar per 1 and 1/4 cups of milk. since I doubled my recipe It was 4 tablespoons of vinegar and 2 1/2 cups of milk. I still added a little more milk than they said because the batter was still a little heavy and thick


So if you have a Quesadilla Maker that you have not used in awhile, or have debated if it needs to go off to the thrift store.  Try using it for other things besides Quesadillas :-)  Every time I type the word quesadilla I hear the way Napoleon Dynamites grandma says quesadilla :-)


Wednesday, February 15, 2012

New favorite!

Ok, I'm all about simple these days and I ran across a SIMPLE donut recipe the other day on Pinterest and, when Publix had their Pillsbury Grand bisquits on sale, I knew I just had to try them.


Sorry about this picture. I can't figure out how to get it turned the right way. :-{


These were so easy and SO yummy, we've now made them twice! Check out the website here for the directions on how to make them. I did modify the directions a little - instead of letting the donuts cool and then dipping them in melted butter before dipping them in cinnamon and sugar, I just took them out of the oil with a fork, letting the excess oil drip off, and put them directly into the cinnamon and sugar. I figured, why add the extra calories and fat, right?? The cinnamon and sugar stuck to them perfectly. Go ahead, go make some. You know you want to! :-)

Saturday, February 11, 2012

Easy Fish Tacos !

So I decided this week our dinner menus would come from some of the Pinterest meals I've been collecting.  I went shopping today for all the ingredients that I needed.  And I decided tonight to start with something simple since I had such a busy day.  I decided on  Fish Tacos  Yay!  These were so simple and yummy :-)  I found the recipe at Behind the Bites.com.  Since they had such a fantastic picture of the process of making their tacos I did not bother taking any pictures of mine, but I will tell some changes that I made with mine.
#1 Instead of shrimp I made Fish Stix because my husband does not like shrimp :-/ but it would taste great with either.
#2 In my sauce instead of jalapenos I used green chili salsa.
#3 I wanted to make mine more like Cafe Rio so  I used packaged cole slaw veggies.  I also added some lettuce in it.
#4 I topped mine with crumbled Mexican cheese.
They were so yummy!  and easy :-)

Monday, January 9, 2012

Orange Cream soda Ice cream!

Saw this on pinterest and had to try it :-) 
The pictures below I took when it was at a sorbet stage, but if you want it like ice cream you need to run your ice cream machine longer until it is thicker. 
Orange soda


                                                                         Root Beer

2 liters of  orange soda (if you want root beer float ice cream you can use root beer)
1 14 oz can of sweetened condensed milk
throw it in your ice cream maker and you get a yummy treat!

It turned out really good, but I am curious how it would taste if I did real juice?  I am going to try that next time and and come up with something that tastes more like an orange Julius  :-)

Thursday, November 24, 2011

Dinner rolls

Happy Thanksgiving everyone!
 I slacked at my plans to post Thanksgiving recipes all week :-/  I have been crazy busy making Nativity puzzles for my Etsy store.  I have been getting orders about every day.  I have 3 puzzles I want to have ready to go by tomorrow!  So I will be spending my Thanksgiving day working on finishing them. 
I am going to my Sister In laws for Thanksgiving and I have been asked to bring the rolls.
I have several roll recipes I like one of them being my moms, but I especially like my neighbor Shauna's rolls :-)
So I thought I would post her recipe.  also I never got to the Turkey My mom had special ways to make a perfect Thanksgiving Turkey. She always said that you need to bake a turkey breast down so the fat and juices from the back settle into the breast and make it more tender.  She had other things she did, but when she passed away she took that knowledge with her.  So I found this link that is very similar to her way of roasting a Turkey so it is what I have followed for the last 3 years. 

Now onto the roll recipe!


Shauna's dinner rolls


2 cups scalded milk (or better yet, 1 cup evaporated milk and 1 cup hottest tap water!)

¾ cup warm water

1 cube margarine, melted

***(you want the temperature of all the above liquids to be 90°-100° or about baby bottle temperature. So if you scald the milk or overheat the margarine, use cold water instead of warm water etc.)***

2 large eggs

½ cup sugar

2 tsp. salt

4 cups flour

2 Tbs. yeast

Add the ingredients in the order listed above, whisking in the eggs and adding the yeast on TOP of the flour (to shield it from the salt). Add 3-4 more cups flour, a ½ cup at a time until the dough cleans the sides and bottom of the bowl. Knead for 7 minutes. Turn out onto lightly floured surface. Squeeze off balls of dough about 2 ¼ inches in diameter. Place about ½ inch apart on a greased baking sheet. Preheat oven to 400°. Cover dough with warm wet towel and let rise about 20 minutes or until double. Bake 15-18 minutes or until golden brown. Brush with butter and cover with a towel until serving. Here's a little video to show you how Shauna shaped the dough balls!

Saturday, November 19, 2011

Wild Rice Cornbread Stuffing

So today I am posting my sister Jana's Wild rice cornbread stuffing recipe.
My mom had really yummy stuffing, but I have to admit I like my sisters just a little bit better ;-)

Here is my sister Jana with her wonderful husband!

She is the third oldest in our family and was and still is the peace maker.  She and I were really close growing up. We shared a room even though I was the youngest and she was one of the oldest.  She is an awesome cook and wonderful mother. She also has the most loud and contagious laugh out of anyone I know :-)


Jana's Wild rice cornbread stuffing recipe

 Make the wild rice the same as on the package, separately.
Cut up onion and celery and simmer with the water for the corn bread stuffing until tender.
 Add the bread as usual.
 Combine the cooked wild rice with the completed stuffing and drizzle on turkey drippings until the stuffing is the right consistency.

That's it!  Easy and yummy!

Tuesday, November 15, 2011

Mom's Pumpkin pie!

I was lucky growing up to have the most motherly,  homemaking kind of mother! 
This picture below is was very typical!  A big family of kids and grand kids and Mom/Grandma in the middle keeping everyone happy :-) But that is what gave her joy! (She is the one in the white shirt in the middle.)
 My Mom and Dad a few years before she died of cancer.
We had the best childhood because of  our wonderful parents :-)
I'm the littlest one in this picture and Paula is the one with the really short skirt ;-)
We have 6 kids in our family, This picture was taken sometime in the late 70's of us 4 youngest girls and our dolls.
My mom was a fabulous cook because she grew up on a Potato farm in Idaho and decided that she preferred doing all the cooking for her family instead of working in the potato fields.  So she started cooking as a young girl. So with Thanksgiving coming I think of my Mom and her wonderful Thanksgiving meals!  My sisters pictured above are also wonderful cooks So over the next week I am going to post some of my Mom's recipes and other family recipes from me and my sisters  that always make our Thanksgiving Dinners super Yummy!

So first off Mom's Pumpkin Pie!
This recipe was passed to her from her Mother and I don't know where it came from before her, but it is wonderful!  I have the best memories about this pie.  We would eat our Yummy Thanksgiving meal until we were sick and thought we would pop!  and then a few hours later (Maybe just a couple ;-)  We would break out the pie with homemade whipped cream!   Then for the next two days we would live off Turkey sandwiches made with the super yummy leftover homemade rolls my mom would make and left over turkey and left over pumpkin pie :-)  Those were the days when I could eat what ever I wanted and nothing happened to my body shape!  Those days are long gone, but it does not keep me from gorging myself at Thanksgiving still :-)  Two keys to what makes my Mom's pumpkin pie so good is #1  Don't add cloves!  She said that is what makes other pumpkin pies taste too strong.  #2  She used winter squash (usually grown from our garden)  instead of canned pumpkin it gives a nicer flavor, but we have used canned pumpkin before and it tastes really good still.  so with out further ado here is the recipe I don't have picture yet, but I will post some when I make my pies in the next few days, but just trust me!  This recipe tastes so yummy!  It is the only pumpkin pie my family will eat!

Mom's Pumpkin pie recipe
(makes 3 pies) heat oven to 350

4 cups squash or pumpkin
4 cups  rich milk
1 cup white sugar
1cup brown sugar
4 eggs
1 tsp salt
1/2 tsp ginger
1/2 tsp all spice
1 1/2 tsp Cinnamon
1 tsp vanilla

Mix all ingredients in a large bowl (blend well)
Pour into pie pastry plates.
Bake 45-60 minutes or until the center bubbles.  (  bubbles mean big rolling movements in the center of pie.  It almost looks like something is moving around inside the pie. ) It also works best if you put tin foil around your crust edges so they don't over bake.

Mom's Pie Crust

3 cups flour
1 cup Shortening
1 tsp salt
1/2 tsp B.P.
3/4 cup water (add more if needed to make a more workable dough)

Roll out barely thin  and place in pie plate cut off excess dough from edges and then flute the edges.

Monday, October 24, 2011

Homemade Krispy Kreme dougnuts


Saw this recipe today at  "Homegrown Beanes" for copy cat Krispy Kreme doughnuts!  I am totally going to try this one!  (As soon as I'm off my diet :-)  It is so hard to find a good recipe for doughnuts!

Sunday, September 25, 2011

There's a worm in my apple!


I just had to share this cute paper apple craft that we made for my 3 year old daughters neighborhood pre-school. Me and 3 other moms take turns doing pre-school each week and it was my turn last week. Our theme was Apples.


 You can find the template for this craft here.  I out did myself and decided to use scrapbook paper for the apple and then I used mod podge to add scrapbook paper to the tongue depressor stick.  I let the kids tape on the tab in back and glue on the google eyes.  That is about all they could handle since they are only 3 :-)  But they loved their little wiggly worms coming out of their apple! 
We also made kool aid play dough that day, which they loved!  They could have done that the whole time and been happy :-)
I like this play dough because it is so soft and easy to work and it is easy to make as well.  The recipe for that is here.

Friday, August 19, 2011

Lemon Buddies!

These sound so yummy to me! I totally want to try them!
 I saw them on the Chex site and they get a 5 star rating so they must be pretty good.  I have heard that they tast like mini lemon bars. 

Wednesday, June 29, 2011

A million dollar pie!

A few years ago I was watching one of the morning news shows and they featured the million dollar winner of the Pillsbury bake off contest. This lady (Suzanne Conrad) won with her Oats and honey granola pie. This recipe looked so good and so easy to make I knew I had to try it! So I did!  And I loved it!  Well the recipe got lost and forgotten in my recipe card file until Monday night.  I was looking for a good family night treat and  I came across this forgotten recipe and remembered how much I liked it.  I had most of the ingredients minus a couple so I decided I could improvise with what I already had in my kitchen.

here is the original recipe from the Pillsbury website and then you will find my tweaked version below:

Oats 'n Honey Granola Pie

Oats 'n Honey Granola Pie
.INGREDIENTS:

Crust1box Pillsbury® refrigerated pie crusts, softened as directed on box

Filling1/2cup LAND O LAKES® Butter

1/2cup packed brown sugar

3/4cup corn syrup

1/8teaspoon salt

1teaspoon vanilla

3LAND O LAKES® Eggs, lightly beaten

4Nature Valley® Oats 'n Honey crunchy granola bars (2 pouches from 8.9-oz. box), crushed (3/4 cup)*

1/2cup Fisher® Chef's Naturals® chopped walnuts

1/4cup quick-cooking or old-fashioned oats

1/4cup Hershey's® semi-sweet or milk chocolate baking chips

Whipped cream or ice cream, if desired.Show Directions

Hide Directions

DIRECTIONS:

Heat oven to 350°F. Place pie crust in 9-inch glass pie plate as directed on box for One-Crust Filled Pie.

In large microwavable bowl, microwave butter on High 50 to 60 seconds or until melted. Stir in brown sugar and corn syrup until blended. Beat in salt, vanilla and eggs. Stir crushed granola bars, walnuts, oats and baking chips into brown sugar mixture. Pour into crust-lined pan.

Bake 40 to 50 minutes or until filling is set and crust is golden brown. During last 15 to 20 minutes of baking, cover crust edge with strips of foil to prevent excessive browning. Cool at least 30 minutes before serving. Serve warm, at room temperature or chilled with whipped cream or ice cream. Cover and refrigerate any remaining pie.


High Altitude (3500-6500 ft):

 
And here is my tweaked version :-)  Shh!  Don't tell anyone, but I think I might like mine better :-)


 Follow the above recipe, but this is what I did different.
-Instead of butter I used coconut oil.
- Instead of oat and honey bars I used 2 cups of granola with almonds in it.
- I am not a lover of walnuts so I did not add them.  I would have used pecans or almonds instead, but I did not have any on hand. So I figured I had few almonds in the granola so I called it good enough:-)
- I also added 1/2 cup of coconut flakes and about a 1/2 a tsp of Cinnamon.
- Instead of 1/8 tsp. I added 1/2 tsp. of salt.
- And for my last change instead of  fitting all the filling into one 9 inch pie crust I distributed the filling  into too pie crusts.  In the past I think having so much filling in one pie made it a little too rich.  and by putting it into two pie crusts the baking time cut to about 30-35 min.
Oh and I also used frozen crusts instead of the refrigerated crusts.  I find that they don't get to brown and overcooked as the refrigerated ones seem to do.
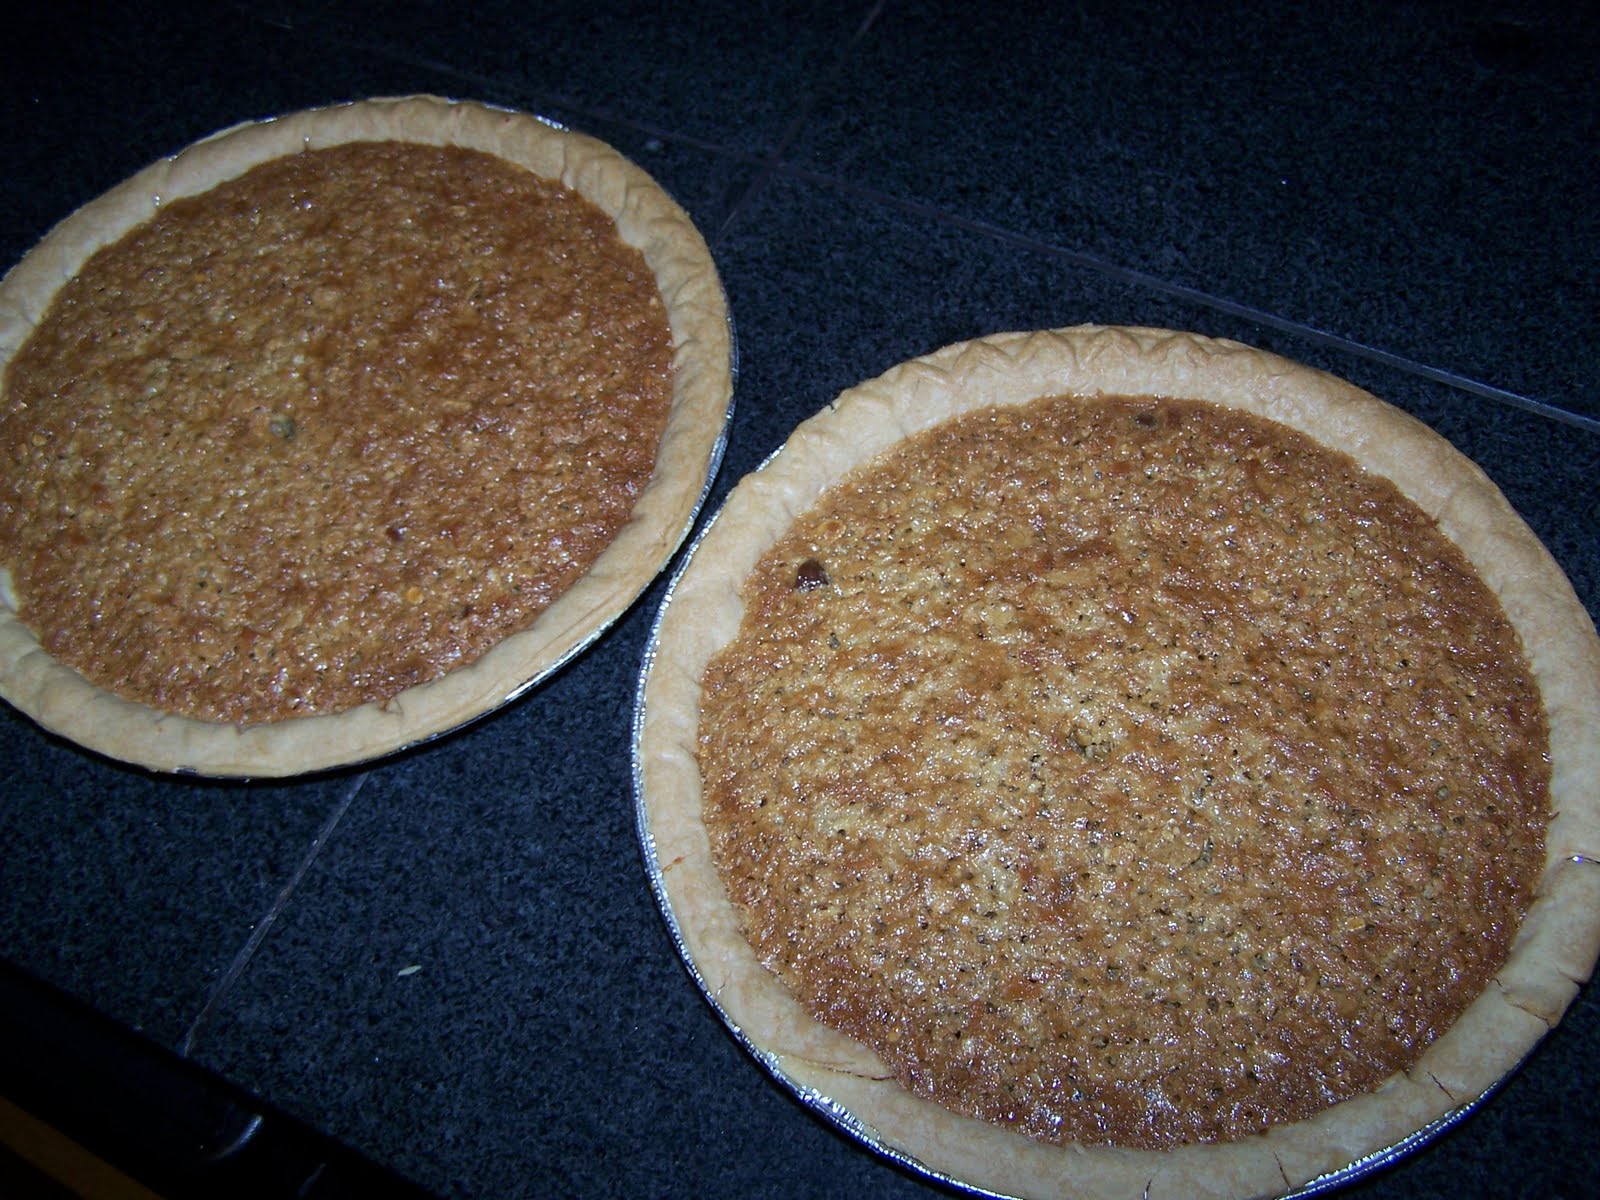
Ta Da! here was the result.  We served them with Vanilla ice cream, but they are good enough to hold their own without any extra ice cream or whipping cream if you want.
This pie is so yummy! And they did not last long at our house. I thought we could save the second pie for the next day, but everyone liked it so much we had to cut into the second pie also :-)
And like I predicted by dividing the filling into two pies it made them a lot less rich.  Which I liked.
I promise you that you will love, love, love this pie!
So good luck making it :-)

Friday, May 13, 2011

Recipes and a Stitchery!

I am a huge fan of the "Taste of Home" and Quick Cooking Magazines! I used to have a subscription, but the magazines would stack up so I stopped getting them. With the idea that I would buy the cookbook that would come out at the end of the year with all of the years recipes. But I never did end up doing that. A couple of weeks ago I went to our local Library with my kids and while browsing I discovered that there was a whole section with cook books. I decided to check out some that caught my eye (most of them were Taste of Home). I have been going through them picking out recipes that sound good to me and trying them out.


What a great way to find recipes without having to buy the book! I don't know about you, but I usually have several favorite recipes in my recipe books and then there are a ton that I don't care much for and then all those books take up space in my cupboard. I wish I had thought of it sooner! I have been slowly copying down ones I know will be good and favorites that I have tried out on my family :-) Everything so far has been a hit with them!


On a different note!


I have been getting back into doing stitchery lately. I have not done it in several months because I have been too busy. but I got to teach a stitchery class to the 12 and 13 year old girls at my church. I wanted something with a Beehive and flowers and a good quote. I could not find anything I quite liked so I compiled several ideas from different patterns and made it my own!


here is what I have done so far.


I will reveal the finished product soon :-)


Also I will update you on how my gardening is going soon :-)


Friday, April 29, 2011

Easy Ramen Noodle Stir Fry

Grrrrr!   Does Spring just not exist anymore?  It is literally snowing outside at my house right now!  Next week is when I planned to plant my garden. I hope Mother Nature will decide which season it is by then! 

Anyway this winter type day made me in the mood for something warm and comforting for dinner.  I saw a recipe a few days ago in one of my many cookbooks using Ramen Noodles in a stir fry.  I have had no luck finding it again.  I just have the image of the picture in my mind.  So I decided to try and figure it out myself using another recipe online as a guide that sort of helped, but it was not exactly what I was looking for so I tweaked it to my liking and it turned out really good :-)    If you are interested here is what I did. Oh and sorry no pictures :-(  My family devoured it before I thought to take a picture.

Ingredients:

2 packages of Ramen Noodles ( I used a combo of oriental flavor and beef flavor)
1 package of frozen stir fry veggies
Meat of your choice. chicken, beef, pork ( I used a lb of ground pork)
1/2 onion (chopped )
water
cornstarch ( 2 tsp)
season salt ( add for flavor)
soy sauce (about a tablespoon)
2 tablespoons oil
1/2 cup of peanuts

First I removed the noodles from the Ramen Noodle packages and boiled them in 2 cups water for 1 minute and took off the heat and drained the water off. 
Then I added 2 tablespoons oil to a saute pan and browned the meat with the chopped onion and sprinkled it with season salt  and about a tablespoon of soy sauce.  Once the meat was browned I added the stir fry veggies. When they started to soften up I sprinkled on the 2 season packets from the  Ramen Noodle packages.
Next I stirred 2 tsp of cornstarch in a cup of cold water and added it to the meat and veggies and seasoning and stirred until It thickened up.  Then I added the noodles to the meat and veggie mixture. I found that my sauce was too thick so I added water a little at a time until it was the nice saucy consistency that I wanted it to be.
 Last I stirred in the peanuts.  Our family also loves to sprinkle those crunchy chow mien noodles on top to give it some extra crunch :-) 

This meal was easy, cheap, and filling!  I will for sure be making it again!

Thursday, April 7, 2011

kneaders Pumpkin Chocolate Chip Cookies!

I love these cookies!  I have been craving them a lot lately!  And I rationalize with myself that they are healthy because they have pumpkin in them and I add oatmeal (fiber right?) to mine.  The recipe calls for 2 cups flour so I replace one of those cups of flour with oatmeal instead.  I also usually double the recipe.   So I made them yesterday and ate more then I should have :-(  but I guess there are worse treats I could eat right!  I got the recipe from Good Things Utah (A morning show here in Utah) a couple of years ago. Here is the link to the recipe.

Friday, March 18, 2011

Where to put all those recipes!

There is a blog I like follow called Controlling My Chaos and she never disappoints with the recipes she posts!  And even better she makes the cutest digital scrapbook recipe cards that you can print out as 4x6 photos.  I had all of my favorite recipes from her blog printed out at Wal Mart, but you have to make sure you pick the true to size prints or they get cropped wrong.  So I have had all these recipe card photos, but I had not found a good solution as to where to put them yet ( I did not want them to get smudged and ruined). 
Well the other day I was at "Michael's" (craft store)  and I FOUND THIS!
It is a cute Paula Dean brand recipe binder (On clearance) that came with plastic protector sheets that hold 4x6 cards and it also has tabbed dividers with the different food categories!  Yay!  I finally found my solution :-)
I love that it is not too big and it holds my recipes perfectly!

One of my favorite recipes I use a lot is her Salsa recipe.  It is so easy and it tastes a lot like the Salsa you eat at Mexican restaurants. 


 I want to add some of my other favorite recipes to the binder so I decided I needed to start making my own cute digital scrapbook recipe cards.  Here is one that I made of the Bread recipe I posted yesterday.


Click on the card to make it bigger, then copy and paste it to whatever file you want it to go to.  I just put mine in a file I made on my desktop called blog recipe cards.

Happy Blogging :-)

Thursday, March 17, 2011

Soft and Delicious Whole Wheat Bread

I  made the best bread this week! 
 I wanted to try a new Whole Wheat bread recipe from the one I usually make.  In my search I came across this recipe in a booklet I got from the Tucson Cannery back in 1999 when we lived there.  When I saw the name "Soft and Delicious Whole Wheat Bread" I knew I needed to try it!
Here is a picture of it when the loaves had  risen and were ready to bake.  I did not get a pic. after they were baked, but you will just  have to believe me that they baked into the most beautiful yummy loaves of bread :-)
The recipe

Soft and Delicious Whole Wheat Bread

Makes 4 loaves

5 cups warm water
2 Tbs. yeast
1/3 cup oil
1/3 cup honey
2 eggs
1/3 cup potao flakes
 1 Tbs. salt
6 cups whole wheat flour
4-5 cups unbleached flour

Dissolve yeast in water.  Make a sponge using all ingredients down to, and including salt. mix and let sit for 10 min. Add flour a cup at a time while mixing until dough is close to cleaning the mixing bowl then knead for about 5 min.  cover with plastic wrap and let rise until double. Punch down; shape into 4 loaves, place in greased pans. cover and let rise until double. ( I used rapid rise yeast so I shaped loaves in pans let them rise in a warm oven about 200 degrees then turned the oven up to 350 and baked for about 30- 40 min.)

Bake at 350 degrees for 30-40 min.. Put hot bread on a towel to cool for a soft crust. 

Thursday, March 3, 2011

Mini Frittatas!

So just bare with me people!
 I am going through a food and recipe stage lately if you have not noticed :-)
 One thing you'll learn about me is I go through stages!  And I have found that it all depends on what time of year it is.  I get really crafty in the fall and winter,  I get into recipes, food and gardening in the spring and summer.  My crafty side seems to be taking a break right now.
Anyway like I said in my last post I can't eat any breads or starches for 3 weeks so I have been looking up good recipes for breakfast.  I found this Frittata recipe and decided to try it this morning and I was not disappointed!
 Picture of Mini Frittatas Recipe
I did tweak it a little bit though.  I added grated zucchini.  I put a couple of tablespoons on the bottom of each muffin tin ( I used regular sized muffin tins and it made exactly 12)  then I put ham and cheese on top of the zucchini and then poured the egg mixture on top.  I also flip flopped the pepper and salt ratio.  That seemed like too much pepper to me and not enough salt.  So anyway they turned out fabulous! A perfect breakfast! They were nice and filling and a handful of blueberries topped the meal off :-)  They would make a great snack for later too.

Saturday, February 26, 2011

The latest :-)

So if any of you saw my post about Tortas here is what I did with the leftovers! 
For breakfast the next day we made Molletes! (an open faced Mexican pizza.)  (Kind of like a french bread pizza) Like I said before this is a breakfast version so we did the black refried beans, eggs, Chorizo, cheese and salsa. Then I broiled them.  So hearty and so filling! So anyway I just had to share that :-)

So I have been thinking a lot lately about how food prices are going up.  Gas prices etc.  I have been feeling more and more that I don't want to be a slave to stores and be more self sufficient.  OK before you start thinking I am a fanatic I want you to know that I really am just  a regular person like you.  I am just learning more and more as my family has been affected by the bad economy that things I used to think I could only buy at the store I can make easily and it is much more healthy! Like the Chorizo I made the other night.  I would have never guessed I could make my own Chorizo!

And today My daughter and I made our own  Wheat Thins!

I love wheat thins!  and I can't believe how it cost us just pennies to make at home compared to what you pay at the store and they taste so close to the real thing without all of the preservatives!  I found the recipe here

Some other easy to make good snacks to make for your family are granola bars, tortilla chips, graham crackers, I am still discovering others :-)

I don't know if you remember that I have Chickens (only hens).   We got them last spring.  They started laying eggs in August and have layed all winter.  I can't tell you how nice it has been to never be out of eggs!  And they taste so much better! 

Now my latest venture is starting to get ready for my garden this spring.  I have it all planned out and I have been itching to get my hands in the earth.  Winter just go away already! I am already starting some of the cool weather veggies inside. Like lettuce, Leeks, green onions, spinach, etc.  I planted them last Saturday and I already have little starts coming up from my onions and lettuce! You can find supplies at the dollar store to start your seedlings.
                                                                           butter crunch lettuce
                                                      green bunch onions

I have done kiddie pool gardens the last two years because I don't like to deal with weeds, but this year I am going to try Lasagna Gardening.  It is supposed to have minimal weeds by using this gardening technique also.  Check out the link above and There is another good link here.  You may be interested too :-)  This year I want to pretty much grow all the things my family will eat veggie wise. I also want to grow herbs and more Strawberries.  I actually want to grow strawberries on the parking strip in front of my house, but I worry that I may not be ambitious enough to do that, but It is an idea I have been kicking around for a couple of years now.  I have heard lately that due to different natural disasters around the world that there have and will continue to be produce shortages. Prices will go way up or things will not be as available so I have decided as many of the rest of you have that as much as I can grow myself the better all around!

Thursday, February 24, 2011

Have you ever had a Torta?

    So I am on the HCG diet.  For anyone who knows what I am talking about I am on my third round and I have about 4 more days left of the strict diet phase and then 3 weeks of the no starches phase and then happily after that the eat normal, but sensible phase!  I am really excited to start eating normally again! For anyone who is not familiar with HCG it is a crazy diet where you take injections of a pregnancy hormone every day and eat a very strict diet of certain foods for 40 0r 21 days depending on how much weight you need to lose, but It was worth it  being a little deprived for a while to  get down another 30 lbs in a month in a half :-)
Any how! My family loves it when I am on the strict phase because they say I cook a lot of really yummy meals.  I just make them what I am craving that day and wish that I could eat.  My latest phase has been Mexican food!
    I watched a cooking show a few weeks ago on how to makeTortas (a Mexican sandwich that street vendors sale in Mexico).  I had never heard of them before, but It looked so so yummy to me!  I have been craving one for weeks!  So the last couple of days I have been researching recipes!
So first I learned that Tortas are made on Mexican rolls called Bolillos. I found a recipe to make my own here and here , but I lucked out and happened to find a big bag of them at WalMart on sale for $1.50, but I still want to try my hand at making them on my own sometime.
I cut these in half  being careful to leave a hinge on one side. You can cut them completely in half and have them be open faced kind of like a Mexican style of french bread pizza.  (They are actually called molletes.) Any way back to the Tortas! other recipes say to dig out the soft bread part, but I did not have the heart to dig out all that good soft bread so I kept it in.  Then you spread refried beans on the bottom half of the roll.( I like to use black refried beans.  I like the flavor better)
Next I wanted to Make mine be a breakfast Torta so I chose eggs for my  next layer.  I cooked up 8 eggs enough for 5 people. ( I got My eggs from my own back yard chickens by the way. So much better then the ones you buy at the store) I seasoned them with salt, pepper and half a small can of green chili's. I also added a couple of tablespoons of cream cheese. ( I did not add milk to these eggs since it was for a sandwich)
My next layer was Chorizo ( Mexican pork sausage).  I have used Chorizo before that I bought from the store and mixed  with scrambled eggs for Mexican breakfast tacos. Those are really yummy to by the way!  Find the recipe here.  But in my research yesterday I found out that Chorizo often has Lymph nodes, saliva glands and other strange parts ground up in it in the store bought kind. Yuck! I have been eating this stuff!  Any way there are a billion different versions and recipes all over online to make your own and it is really easy!  I chose this recipe.  I tweaked it a little bit and and used ground pork and I switched out the Vinegar with lemon juice and added another tablespoon of paprika.  It took me about 10 min to put together and it sat in the fridge for about 24 hours so the flavors could blend well. 
It ends up looking like a thick paste like this.

But after you cook it up It looks like this :-) I cooked mine up with dried minced onions

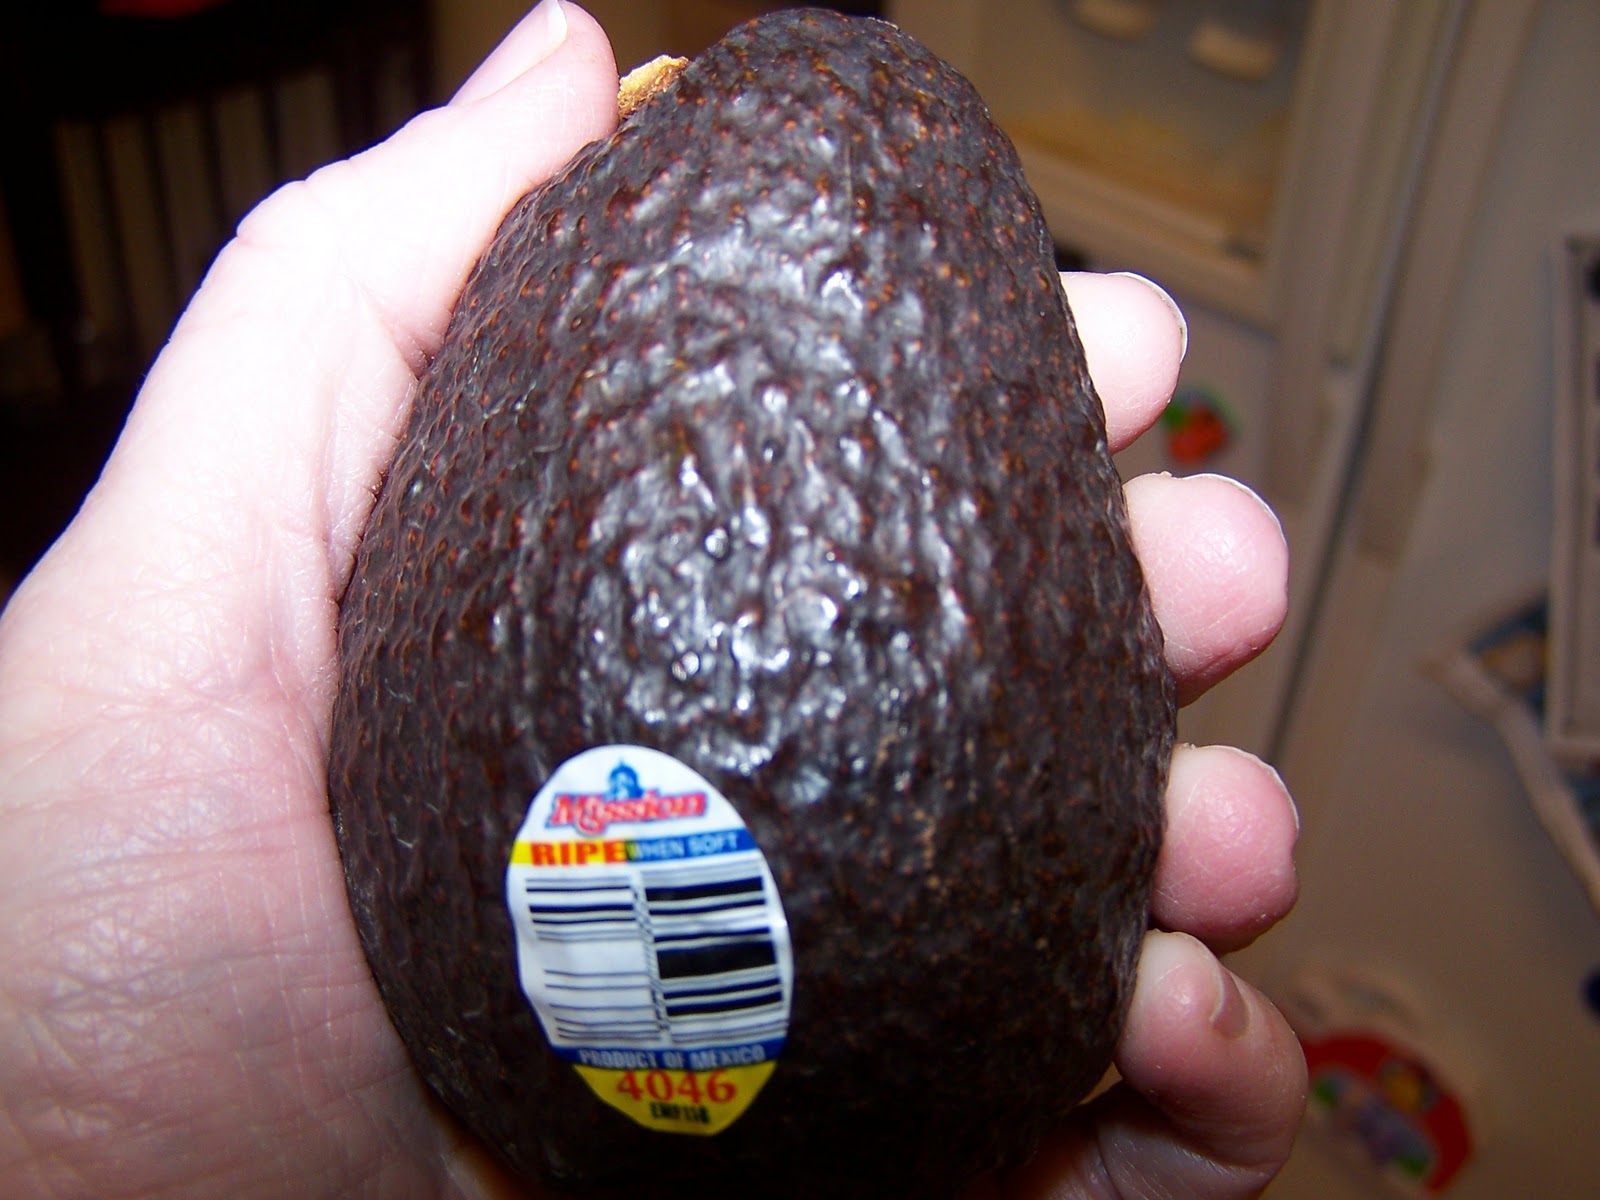
Then my next layer was cheese.  Then I added a  lettuce and I would add tomato too, but my family does not like fresh tomatoes so I left it out this time (their loss!). And they say a Torta is not a Torta with out avocados or guacamole.  so I made some guacamole.  Make sure your avocados are not too hard.  When you press on them they should have some give to them. , but not be too squishy.
I don't like to add too much to my guacamole.  Less is more I think when it comes to guacamole.  I just season mine with salt, pepper, onion powder, a little garlic powder and a little bit of lime juice (not too much)  Sorry the color came out strange on my camera.  The guacamole looked much better in person :-)

I topped it off with Salsa and spread Sour cream on the top half of the Bolillo roll and shut that big boy up!   Here is how they turned out!
And here was the end result of my 10 year old sons plate who is known for leaving most of his dinner behind on his plate So that tells you they were a  big hit with my family :-)
To bad I could not have one :-( Ho Hum!  Oh well I will get to try one in about 3 weeks :-)
Any way there are a lot of other ways you can make them browse around and google it.  You can use beef , chicken , shrimp, ham  anything you want as your main center.  Anywat I had fun researching this popular Mexican sandwich and I hope you give it a try!  Once you bite into one you will be glad that you did :-)