Thursday, August 23, 2012

Double Yokes!

My baby chicks I got last spring are are little ladies now and have been laying eggs for a couple of weeks :-)  My son gathered up the eggs the other morning and this is what he brought in a huge egg!
  
The one on the right is a regular sized egg. 
And this is why the egg was so huge!


Double Yoke :-) My son claimed this egg since he gathered it.
interestingly we have had two other double yoke eggs this week.  I think that my new hens are just still getting the hang of this whole laying thing and unfortunately I don't think this fun phase of double yoke eggs will last long :-(


Thursday, August 16, 2012

Calgon take me away!

It has been a long time since I have posted on this blog.  Do people still even blog these days?
 Back in 2009 when I first started blogging it was so fun!  I liked to find and follow other blogs with cute and clever ideas to share.  Then I have noticed over time blogging become more like a business for some people!  They would have guest posts with other bloggers and then of course you can't forget the giveaway contests to draw more people to their blogs.  I would say I am pretty computer savvy, but I can't seem to keep up with all the new changes that happen every few months in the blogging world.  Every time I think I have things down pretty good I find new things other people are doing like adding face book, tweet and Pin buttons to their blogs. etc
And now that Pinterest is so big I don't even follow my favorite blogs anymore.  I can find everything I am looking for on Pinterest and it links me to the blog or website that those pins come from.
Today I was catching up on some other blogs that I have followed in the past and I am amazed at the energy these women must have!  Some how they have time to be a mother, Do regular cute crafts, remodel their homes, go on awesome vacations, Have amazing organizational skills, Spotless houses, Make special gifts for their kids teachers, keep up with every Holiday, sew boutique style clothes for their kids, keep their home cute and trendy with  DIY tricks and tips, prepare new exciting and delicious meals and desserts, Get noticed by craft stores and magazines and be invited to share their wonderful crafting knowledge at special craft conferences and be featured in their magazines.  My personal favorite sign that you must have made it big in the crafting world here in Utah is when you get invited to be on Studio 5 or Good Things Utah :-) It made me tired just reading about it all!
My life This summer consisted of being a Frazzled Mom who can't seem to keep up with all my kids are involved in, A house that always seems to be a mess, A garden that does not seem to want to produce anything except Zucchini, A Million craft ideas that are in my head, but seem to remain in my head because I can't seem to find the time to sit down and make them, No awesome vacations because we don't have the money or time to go on any, I did read a couple of good books, "How Green was my Valley" and "EdenBrooke"
Going to Girls camp and keep up with my Young Women's calling, Every room in my house needs reorganized and redecorated, Trying to get my kids ready for the new school year, Swimming lessons and football practices, 3 different kids birthday and parties to go with them mingled with Family visiting from out of town (which was the biggest highlight of my Summer :)  And to top it all off instead of getting healthy and fit this summer I became less healthy and gained a few unsightly pounds :-/  So I guess I feel a little under whelmed with myself and my accomplishments this Summer :-)  One thing I am excited about lately is I have started getting big bulk orders for my unfinished Nativity puzzles and That will force me to clean the garage and get back into the wood cutting mode :-)
Well sorry to go off and ramble on so long.  My next post will be more useful and exciting I promise!

Michelle

Thursday, June 21, 2012

Yummy Italian Pasta with Tilapia!


 So I was sitting there wondering what I should make for dinner?  Of course as usual I had forgotten to take meat out to thaw on time for dinner, but I remembered I had frozen Tilapia which can cook quickly frozen.  I was pondering this when my daughter told me she felt like having some type of Italian pasta.  I thought... can you make pasta with fish?
So I looked it up and sure enough their were tons of recipes, but none was exactly what I was wanting so I took a couple of ideas from a couple of different recipes and then I added my own ideas also :-)  
It turned out so Yummy!  So yummy in fact that my husband who does not normally like fish had 3 helpings!  And it was a nice light summer meal, but yet very filling.

I hate posting pictures of food because it does not like as good in the picture as it does in person, but I thought I better give you an idea of how it looks.


So here is what I did :-)


Ingredients

about 5 Tilapia fillets

one small onion chopped up fine

a couple of cloves of garlic minced

1 tablespoon Parsely

 1 tablespoon Oregano 

1 tablespoon  Basil

2 cans of Italian tomatoes

1/4 cup cream cheese

cup of frozen spinach

oil as needed in the cooking process

A 16 oz package of pasta (whatever you kind you like)


First bring  a pot of water on the stove to boil (for the pasta) and turn the oven on to broil (for the fish).  In a deep skillet saute onions and minced garlic in a couple of tablespoons olive oil at  medium heat on the stove.
After the onions are cooked down add the two cans of diced Italian tomatoes (or you can used Italian stewed tomatoes instead.) Next add all the herbs and let it simmer.  while that is simmering place Tilapia fillets on a shallow cooking sheet drizzle with oil and sprinkle with lemon pepper and season salt then place it in the oven to broil. (Add your pasta to the boiling water if it is ready at this point.)  I don't know an exact time the fish are done under the broiler I just keep checking them until they look moist but flakey.  Once they are done I add all the fish to the skillet mixture and mix it together (the fish naturally flakes off into chunks).  Next I stir in  the spinach and cream cheese and I let it simmer together until everything is mixed in and heated through.  By this point your pasta should be done so you drain it. Spoon the Tilapia mixture over the pasta, sprinkle  Parmesian or Feta cheese on top and enjoy!

I would love to hear back if you tried this meal and what you thought of it :-)


Sunday, June 10, 2012

Life is Fragile :-)


I heard this quote at church today :-)  I really liked it, and thought I would share it with you all !

Thursday, June 7, 2012

DIY Rose Wire Rings

I saw this tutorial at Handmadeology.  And I thought to myself  hmmm..... I can do that!   Or something similar to it anyway :-)   I did not have the right wire on hand, but it was about 9:00 at night (too late to go to the craft store) So  I decided to mess around with some galvanized steel wire that we had on hand in our garage, and this is what I came up with :-)


If you are interested to know how to make one yourself  here is a little tutorial of how I made them.  I feel like I am terrible at explaining  tutorials so hopefully it makes sense :-) 

These are the supplies that I used. Galvanized steel wire we had in our garage,  wire cutter and pliers, and a tube of chap stick.


First I got a piece of wire.  I am not sure how long it is.  I just unraveled two rotations from the this wire spool. maybe it is about a foot long.

I realized right away that the wire was pretty thin so I doubled it up. 


Then I twisted it to give it more stability. And happily I think it gives it a nice look with the twist.  I found that it helps to get a more uniform twist if you use your pliers. it is hard to see in the picture that I am twisting the wire, but if you look really close you can tell :-)


Once I had it all twisted I wrapped it around a chap stick tube. this is the part where it gets confusing to explain.  I placed the chap stick tube directly in the center of my wire piece

 then I wrapped the wire around the tube crossing the two ends across each other. 

Then I wrapped it around again a second time until the two ends met up again.


This time cross the ends and twist them around each other once.


Then start wrapping/spiraling them around the middle twist part.  


Keep wrapping/spiraling them around until you can't wrap them anymore. At this point you need your pliers to help tuck the ends under and I also use the pliers to shape it a little more to my liking.
And this is what you end up with :-)


I have made one for each of my girls even the 3 year old.  They love their rings :-)
I love it when I can make pretty things with ordinary stuff laying around my house!

Wednesday, June 6, 2012

June bugaboo book club pick

The book I chose for the month of June  is "How Green Is My Valley" by Richard Llewellyn.
  I am choosing this book because It was recommended to me recently, and I just so happened to find it at my local thrift shop for $1.00!
I love it when I find little lucky gems like that :-)  This one also happens to be a 1940 edition so i thought that was kind of neat also.  I love old books that I know have belonged to someone else and have a history! This has written inside "With love from Clarence and Fern Sept. 14th 1944."  I just Love that!


I have not read this book before so I will be discovering it along with you :-)  Here is Amazons  review.


How Green Was My Valley is Richard Llewellyn's best-selling - and timeless - classic, as well as the basis of a beloved film.
As Huw Morgan is about to leave home forever, he reminisces about the golden days of his youth when South Wales still prospered, when coal dust had not yet blackened the valley. Drawn simply and lovingly, with a crisp Welsh humor, Llewellyn's characters fight, love, laugh, and cry, creating an indelible portrait of a people.
Richard Llewellyn (1906-1983), a Welsh novelist, was born in Hendon, England, in the county of Middlesex. Before World War II, he spent periods working in hotels, wrote a play, worked as a coal miner, and produced his best-known novel, How Green Was My Valley, as well as 19 other novels. After the war, he worked as a journalist, covering the Nuremberg Trials, and then as a screenwriter for MGM.


UPDATE:  I loved this book!  It was so well written and had so many life lessons in it!  It has a lot of depth so if you are a shallow reader this book might a little more difficult. For me it was a masterpiece!

Friday, May 25, 2012

LDS Etsy team prize give away!

I am so excited let you all  know about a Esty give away that I am involved in!  I and several other Etsy store owners are donating items from our shops for a 16 prize give away :-)  There will be one winner and 16 prizes! Whoot! Whoot!  Check out all the details at http://babygiveaways.blogspot.com/2012/05/lds-etsy-team-giveaway-1-winner-16.html
 I am giving away a Wood burned, water colored, Decorative set of Russian Dolls.  Check out the rest of the great prizes!

Good Luck!

Wednesday, May 9, 2012

Mothers day pendant Necklace DIY

Hey all!
So Mothers day is coming up this Sunday and I made a fun and hopefully meaningful gift for all my sisters and sister in law.  I have wanted to do this project for about 2 years now and finally got my act together this year and made it happen :-)
My Mom passed away about 5 years ago from cancer. My sister in laws Mom passed away from cancer about 10 years ago.  So Mothers day is a difficult day for all of us.  I wanted to make something to honor our Mothers, and to keep the memory of their beautiful spirits that have passed onto the other side close to our hearts :-)

I made Pendants with their photo and matching ear rings. I was just going to make the pendants, but felt matching ear rings would be a  nice touch :-)


This is my sister in laws Mother up above.  Her Birth stone is Garnet so I found beads in that color.


This is my Mother :-)  Her Birthday stone is the Amethyst  and also her favorite flowers are lilacs so purple is her color :-) I can't wait to wear this on Sunday!

If you want to make something like this yourself here are the supplies I used.


You will need a....

-pendant blank
-chain
-epoxy squares.
-beads and charms to enhance it.
- a small photo or picture

I got most of my supplies from Buyjust5supply on Etsy.
  I used my digital scrapbook program to make the pictures the size I wanted (after several attempts) to fit in the pendant tray.  
I put the epoxy square on the photo (love those things)
Then I put a drop of diamond glaze in the pendant tray and pressed the photo in.
Add the chain and your done if you would like, but I added beads and charms to mine to add some character and a personal touch.


I also am making this yummy Sugar Lemon Scrub for the other friends and mothers in my life.

You can find the recipe here. So easy!
Instead of  adding 1 cup olive oil I added a half cup coconut oil and a Half a cup of Olive oil, but other than that it is all the same.

Have a Happy Mothers day everyone!  :-)


Thursday, May 3, 2012

May 2012 Bugaboo book pick "Edenbrooke"

So after a very long time I am posting another bugaboo book club pick :-)
So the book for this month is "Edenbrooke" by Julianne Donaldson.
I have not read this book yet, but I was told by a very good authority (Paula) that it is fantastic!  Like stay up until 4:00 in the morning reading it good. It also gets 5 stars on Amazon ratings.
So like I said I have never read this book so I will have to give you a review when I read it ;-)
Paula maybe you can give a review without giving too much away.

Happy reading!

Tuesday, May 1, 2012

Quesadilla Maker Pancakes!

Hi people :-)
I have not posted in awhile..... it seems :-/  
I have been concentrating most of my energy right now on my garden.  I just put my Tomato and pepper plants in the ground and I planted almost all my other stuff about a week and a half ago and it is fun to see all the little baby plants coming up :-)  In my next post I will share with you what I have been doing with my garden this year.
Enough about my gardening fetish and lets move onto Pancakes!

I saw a while back someone somewhere  talk about how they make pancakes in their Quesadilla maker and I thought to myself, Don't I have a quesadilla maker?  So entered my dark cave (garage) where I store all  my rarely used appliances and sure enough there it sat way up high on a tall shelf where it has literally collected dust for about 3 years maybe 4?
 I had forgotten I had it!  I could have used this all this  last year as my 3 year old has begged me for quesadillas for lunch.

I wanted to also try this IHOP pancake recipe I found on pinterest;.  I thought it would be fun to try them both out and have breakfast for dinner.


They were so Yummy!  I doubled the recipe and after a family of 6 people ate this is how much was left pictured above.  I also added blueberries to half the batch.  What I liked about them is they reminded me a little bit of heaviness of German pancakes, but with a lighter texture. I also found these smaller triangles were perfect sized for my 3 year old who cannot normally finish a big pancake.

Some tips:.
1. spray your Quesadilla maker with cooking spray before you pour the pancake batter in.
2.  I poured about a 1/4 cup per triangle section.
3. Cook for about 2 min.  It gets pretty hot so check it at about a min and a half and poke the fattest part.  if batter oozes out you know you need to shut it and cook a little longer. But I found two minutes was pretty perfect except for the batches I made with blueberries had to go a little longer than 2 min.
4. You can pull it out as one big pancake with triangle sections still attached per each persons plate. or break it up in smaller triangles like I did for people to take as much as they wanted.  I did find that people ate 5-6 triangles(besides the 3 year old she had two)  so it came out to about the same.
5. For the pancake recipe I did not have buttermilk so I just added 2 tablespoons of vinegar per 1 and 1/4 cups of milk. since I doubled my recipe It was 4 tablespoons of vinegar and 2 1/2 cups of milk. I still added a little more milk than they said because the batter was still a little heavy and thick


So if you have a Quesadilla Maker that you have not used in awhile, or have debated if it needs to go off to the thrift store.  Try using it for other things besides Quesadillas :-)  Every time I type the word quesadilla I hear the way Napoleon Dynamites grandma says quesadilla :-)


Saturday, March 24, 2012

Easter Eggs with Words of Affirmation

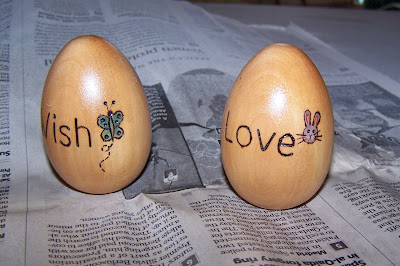
I Just thought I would show you all some of what I have been up to lately.  I made a custom order of eggs this week for one of my Etsy customers :-)  She got a set for each of her daughters and herself.  I wood burned the words of affirmation and designs and then painted and polished the eggs to a smooth shine :-)


Here are some pics closer up.  


I love how they look so simple and cute!  
                     

Tuesday, March 20, 2012

Wooden Easter eggs!

I have a new batch of eggs I wood burned yesterday to add to my Etsy store :-) I will be painting them today and hopefully have them ready for my store tomorrow!

This is one I am still working on.  I need to wood burn the flower petals.(which takes a lot of time and concentration!)
I also picked up these wood boxes at the dollar store and thought it would be fun to wood burn designs on them.  The design on this one is All about my Mom :-)  She loved Lilacs and nature.  I do too :-)  
I can't wait to paint all this stuff !


Friday, March 16, 2012

New baby chicks!

We lost a couple of our older Hens over the Winter.  I went to Cal Ranch to pick up 3 new ones and ended up coming home with 7!  I now have 12 chickens!  What I was thinking I do not know.  I just could not make up my mind on what kind I wanted ;-/  Luckily they wont be laying eggs for a few months, but when they do we will be getting a dozen eggs a day.  I suppose we will have to start selling fresh eggs :-)
If you are thinking of getting new baby chicks this year for the first time here are a few tips that I have learned.

1. Make sure you have a heat lamp.  It was so cute yesterday after we brought the new chicks home and put them in the bin when we added the heat lamp and turned it on they feel asleep almost immidately!
2. Make sure you have a special chick feed.
3. They also need plenty of water
4. It is best to get feeders and water containers especially for chicks.
5. get a bail of straw (not hay) for bedding.
6. Make sure you have a suitable coop to transfer them in when they are old enough.  You can buy a coop, but it is much cheaper to make your own.  If you are turning a rabbit hutch or something like that into a chicken coop make sure you have a a roosting pole for them to sit on.  At dusk every night they love to go in their coop and hop onto their roosting pole and fall asleep.
7. Also make sure you have a chicken run attached to your coop.  Chickens do not enjoy just sitting in their coop all the time.  they like to get out and walk and scratch around. We turned an old dog run we were not using into a chicken run.
8. The more you handle your chicks the more they get to know you and become tame and social.  But when they are new babies you don't want to handle them too much.  picking them up and petting their little heads a couple of times a day should be enough.
Once they are old enough you will want to get them feed that is more suitable for an older chicken.  In the summer they eat  bugs and stuff so you want a summer feed that has less protein in it, but in the winter when they have less opportunity for protein you will need a winter feed that had protein added.
9.  Make sure you clean out old straw and replace with fresh straw every few days.  the old straw is great in compost.  Chicken poop is a great fertilizer, but it can burn your plants if it is to fresh.  I just had mine to my compost bin and let it cook and breakdown with every thing else.
10.  Have fun with your chickens they really are social animals and they have personalities too :-) We like to pick ours up once in awhile even after they are big and just pet them. they love it!
11. Let them out a couple of times a day to grass feed and find bugs and stuff.  I let mine out first thing in the morning and let them peck around for a while and then I feed them their feed and water which gets them all to come back running to their coop with no trouble because they want their food.  then I let them out again in the evening and they go back in their coop on their own to roost.

If you have any other questions that I did not cover just contact me :-)

Tuesday, March 13, 2012

More Russian dolls and a Menorah puzzle :-)

I have decided that I must have an have a thing for Russian dolls because I keep making them!
This set is a mother and her two girls.  I have learned that groupings look better in an odd numbered set.  So I made this one as 3.  Typically Russian dolls come in groups of 5.  I actually have a set of 5 that is wood burned and ready to paint, but it is in my church bag because my 3 year old loves to play with them all the time. So I never get a chance to finish them :-)
 I hope you all are not getting tired of my little wood projects that I seem to be addicted to lately.  Maybe I will try something new soon.  Anyway back to the dolls.
I should have taken a picture of these wood dolls before I painted them, but I did not think of that until after I had painted them :-/ Anyway I woodburned the designs and features and then I water colored it and sealed and buffed them.

This set is larger.  You can see how big they are from the picture above where I am holding them in my hand. This set would be a cute decoration in a kids room or they can play with it. The smaller ones would be easier to play with though.
The mother looks kinda ornery huh, but I decided I would make this set more realistic :-)  I was trying to show how Russian  pheasants really looked and felt. 

Another project I have been working on is this custom order from my Etsy store.  A lady liked my Nativity puzzles and wondered if I could make her a Menorah puzzle.  It was a lot more complicated than I thought it would be, but It turned out pretty I think.

How it works is there is a space under each candle for a chocolate coin and it is like a advent where each day you pull out a candle puzzle piece and then you set it in an upright position and eat the chocolate coin underneath. fun :-)  

Any way I made three of them and I am sending it off in the mail so I thought I would take a picture of it before I send it because it is a custom order and I may not make one again.


Tuesday, March 6, 2012

Wood Egg update!

I decided to watercolor the wood eggs that I wood burned recently.  These eggs would be fun to have and use every year.  Kind of like Christmas ornaments. You could make a new one every year to add to the collection :-) Here is how a couple of the eggs turned out.  If you would like to see how they all turned out check them out at my Etsy store.


Friday, February 24, 2012

Fun with Wood eggs!

So I posted a couple of wood eggs a little while back and I finally made a few more this week.  I have not painted them yet.  I am still undecided as to how I want to paint them.  Water color? acrylic? just stain?  Hmmmm....
One thing I have realized is that eggs are hard to photograph!  Because they are round it is hard to give a true idea of what the designs really look like.  In real life they are much cuter, but this gives you an idea  :-)

This first little bunny likes to  hop along in the nice spring landscape. And on the other side of the egg is his little house :-)

Next I have another little bunny hopping around happily in the spring grass and flowers!


This next egg.  Cute mushrooms with a cute little ladybug on top.  the back side is grass and flowers.


Sticking to the mushroom woodsy theme I made some cute gnome garden girls.

This next egg was inspired by my Laying hens :-) I have a hen on one side and a rooster on the other.


And last some butterflies :-)  


Eggs are fun to wood burn, but because they are round it makes in kinda tricky to work with.  It is much easier to wood burn a flat surface :-)  

I can't remember if I showed this little peg doll yet.  In the past I have usually just painted my peg dolls, but I have tried my hand at wood burning the last couple I have made and I can't decide which I like better.  

Happy crafting!